Relocating a WordPress website to a new domain is a frequent task for developers, but it often comes with the risk of broken links and lost content. Ensuring a seamless transition where every URL, image, and internal reference correctly points to your new domain is critical for user experience and SEO.
In this article, we outline the steps required to move your WordPress site to a new domain without breaking links. We will primarily utilize WP Migrate Lite for the core migration process, demonstrating precise database and file handling. We’ll also explore how WP Migrate can further streamline and accelerate these domain transfer workflows.
Understanding the Domain Migration Challenge: Why Links Break
Moving a WordPress website to a new domain often results in broken links. This happens because WordPress stores absolute URLs and file paths directly within its database. It doesn’t rely solely on relative paths.
A WordPress site’s primary address is stored in the siteurl and home options within the wp_options table. However, beyond these obvious locations, your old domain’s URL is embedded in countless other places:
- Within the content of your posts and pages in the
wp_poststable. - In custom fields managed by plugins or themes (often in
wp_postmeta). - In widget settings, navigation menus, and various plugin configurations, which are frequently stored as complex, serialized data within the
wp_optionstable or custom tables. - Direct links to media files, which also contain the domain name.
The challenge with this deep embedding, particularly with serialized data, is that a simple text-based search and replace on a raw SQL file can corrupt these complex data structures. If the length of the string changes during a simple replacement, it can break the serialization, rendering menus, widgets, and many plugin settings nonfunctional. The solution is to use a tool that can intelligently find and replace these URLs and paths while preserving data integrity.
Pre-Migration Checklist: Preparing for a Smooth Transition
A successful WordPress domain migration relies heavily on thorough preparation. Taking the time to complete a few key steps before you begin the transfer process can save you from significant headaches, unexpected downtime, and data loss. This checklist ensures your source site is ready for export and your destination environment is prepared to receive the data.
Full Backup: Your Essential Safety Net
Before making any changes to your live site, the single most critical step is to create a complete and verified backup of your entire WordPress installation. This includes both your database and all your website files (themes, plugins, media uploads, and core WordPress files). This backup serves as your absolute failsafe. If anything goes wrong during the migration, you can revert to the original state of your site without permanent data loss. Store this backup securely in an off-site location, not on the same server.
Update Everything
Outdated WordPress core files, themes, or plugins can introduce compatibility issues or unexpected behavior during a migration. Before you begin the export, ensure that all components of your source WordPress site are updated to their latest stable versions. This minimizes the chances of encountering errors related to old code when the site is transferred to a new environment.
Clean Up Your Site
To reduce the size of your migration package and streamline the transfer process, it’s beneficial to perform a site cleanup. This involves:
- Deleting unused themes and plugins: Remove any themes or plugins that are no longer active or necessary.
- Removing old media: Consider deleting any unused images or media files from your Media Library that are no longer relevant to your site.
- Cleaning your database: Utilize a database optimization plugin or manually clear old post revisions, spam comments, and transient options. A smaller, cleaner database will export and import faster.
Prepare Your New Domain and Hosting Environment
Before initiating any export from your old site, ensure your new destination is ready.
Make sure the new domain name is registered and accessible and have your new hosting account provisioned and ready.
It is generally recommended to start with a completely fresh, default WordPress installation on your new domain. This provides a clean slate to import your old site’s data and files into. You’ll replace its database and wp-content folder with your old site’s data.
Step-by-Step: Moving Your Site with WP Migrate Lite
This section looks at the steps required to export your site’s database and files from your old domain and successfully import them onto your new one, ensuring all internal links are correctly updated.
WP Migrate Lite offers a Full Site export option that bundles both your database and files, but in this case we’re going to export the database and files separately. For a domain migration, this approach emphasizes the critical URL replacement within the database, provides greater control over each component for precise execution, simplifies troubleshooting if issues arise, and can make managing larger site transfers more efficient than a single, massive archive.
Install WP Migrate Lite on Your Old Domain’s WordPress Site
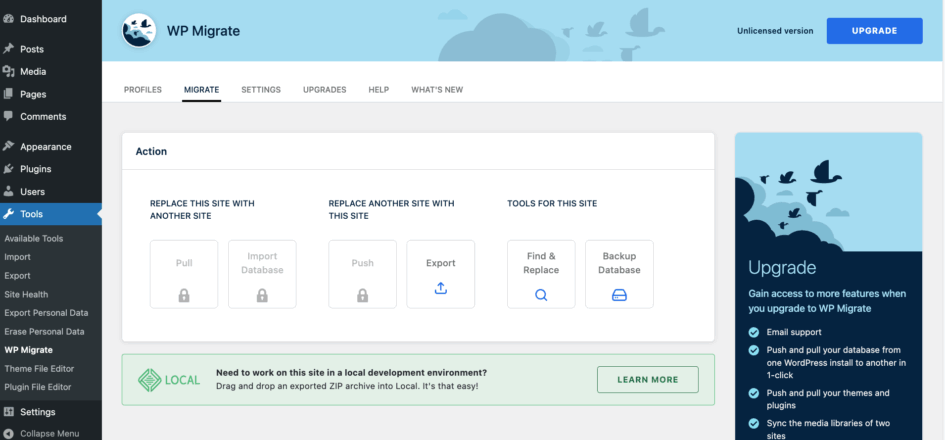
First, ensure the WP Migrate Lite plugin is installed and activated on the WordPress installation running on your old domain. You’ll find it by navigating to Tools .> WP Migrate in your WordPress admin sidebar.
Export Your Database with Domain Replacement
This is the most critical part of a domain migration, as it handles the updating of all old URLs to the new ones directly within your database. WP Migrate Lite’s intelligent Find and Replace feature is essential here.
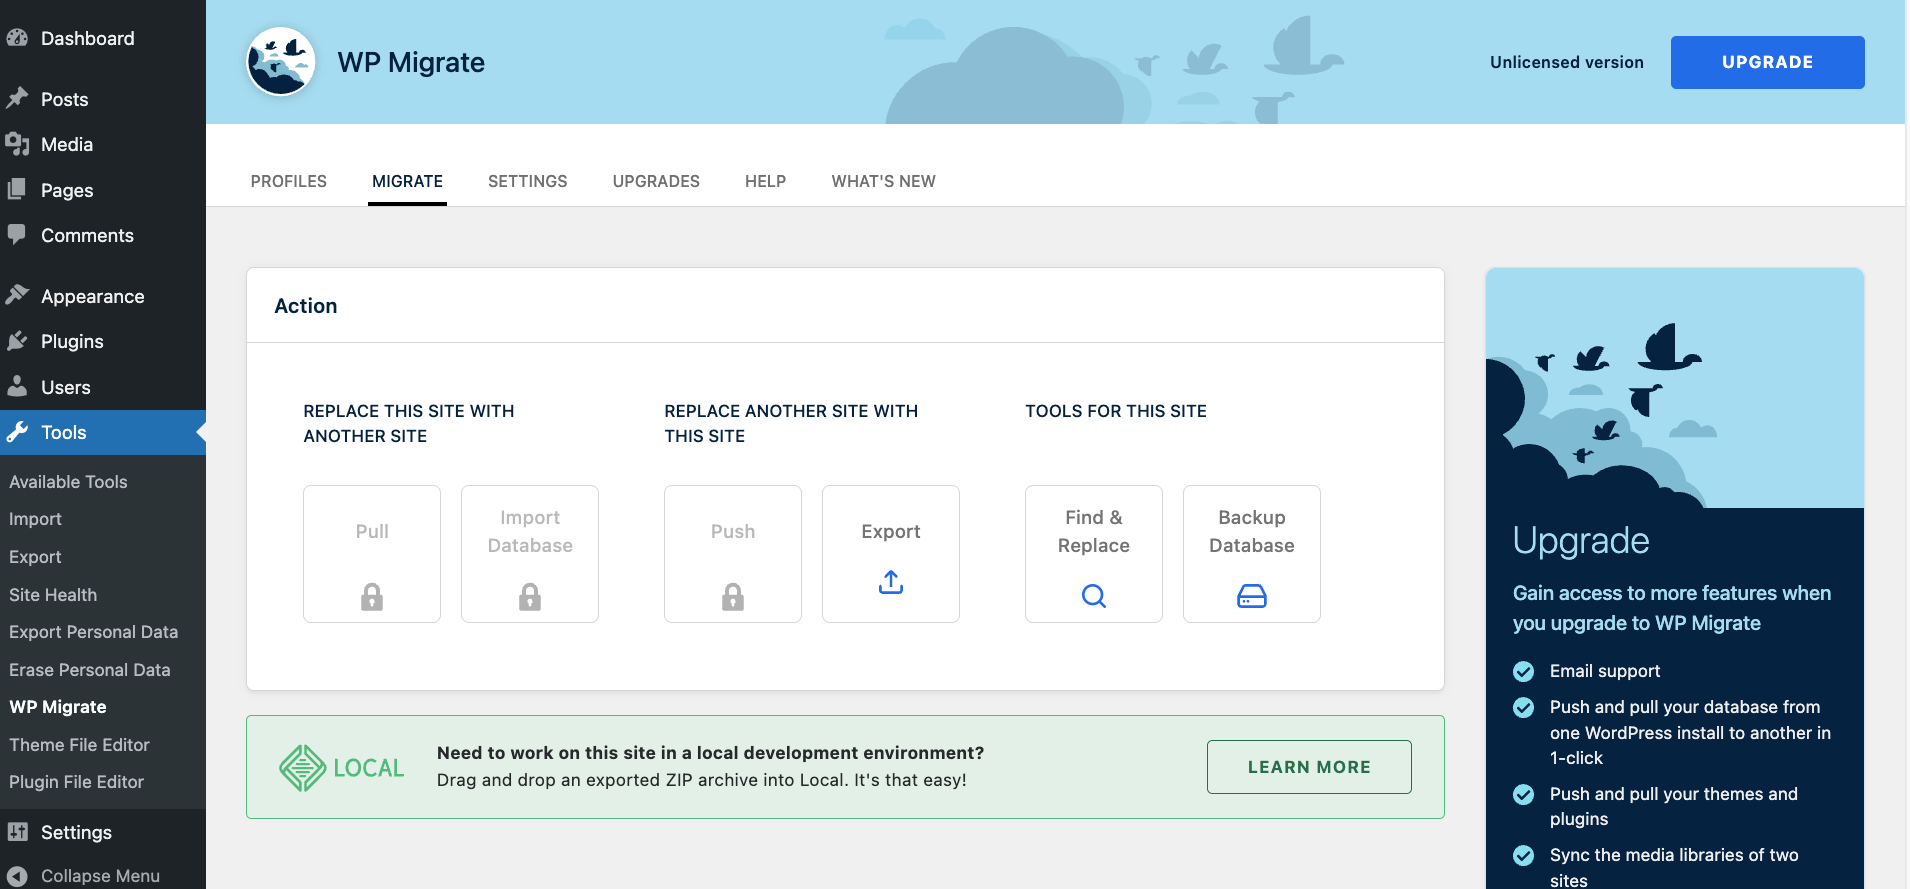
From your old domain’s WordPress admin, access WP Migrate Lite’s main interface, select the Migrate tab, and then click Export
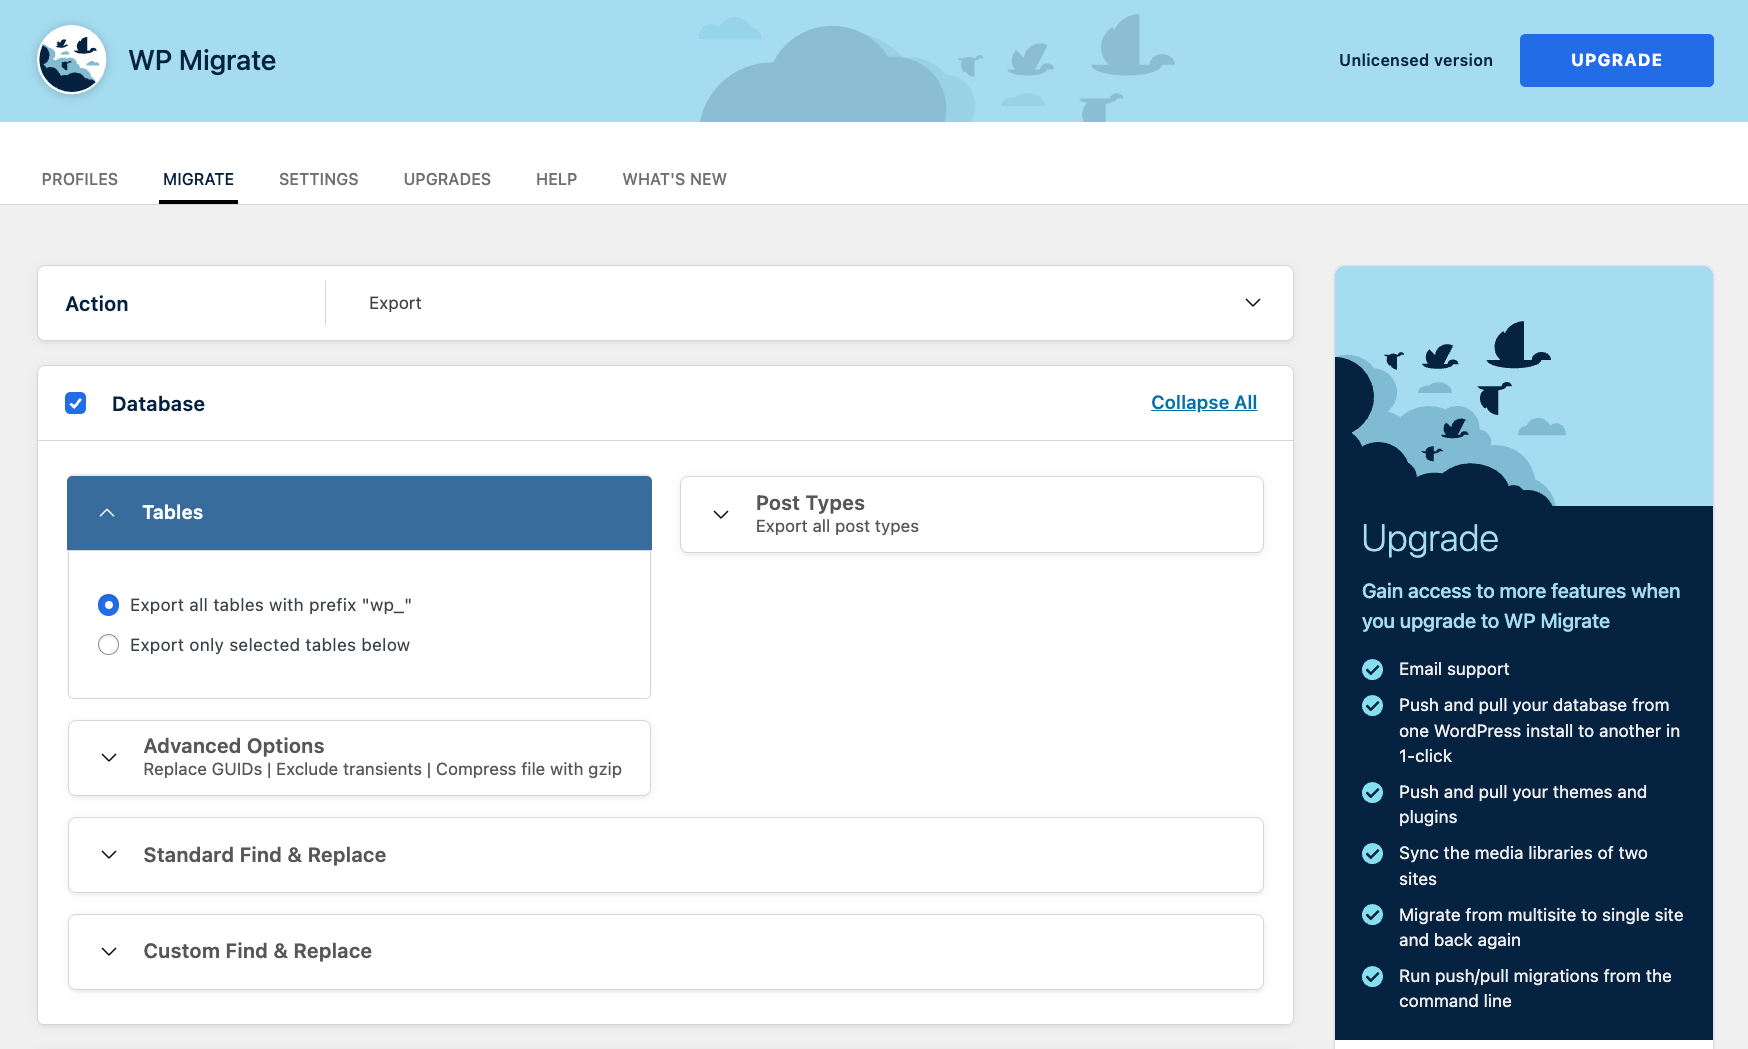
The “Database” checkbox should be checked by default. Next, click Tables, and ensure that the radio button “Export all tables with prefix “wp_”” is selected. This ensures every piece of data stored in the database is included, including site options, post content, and plugin settings.
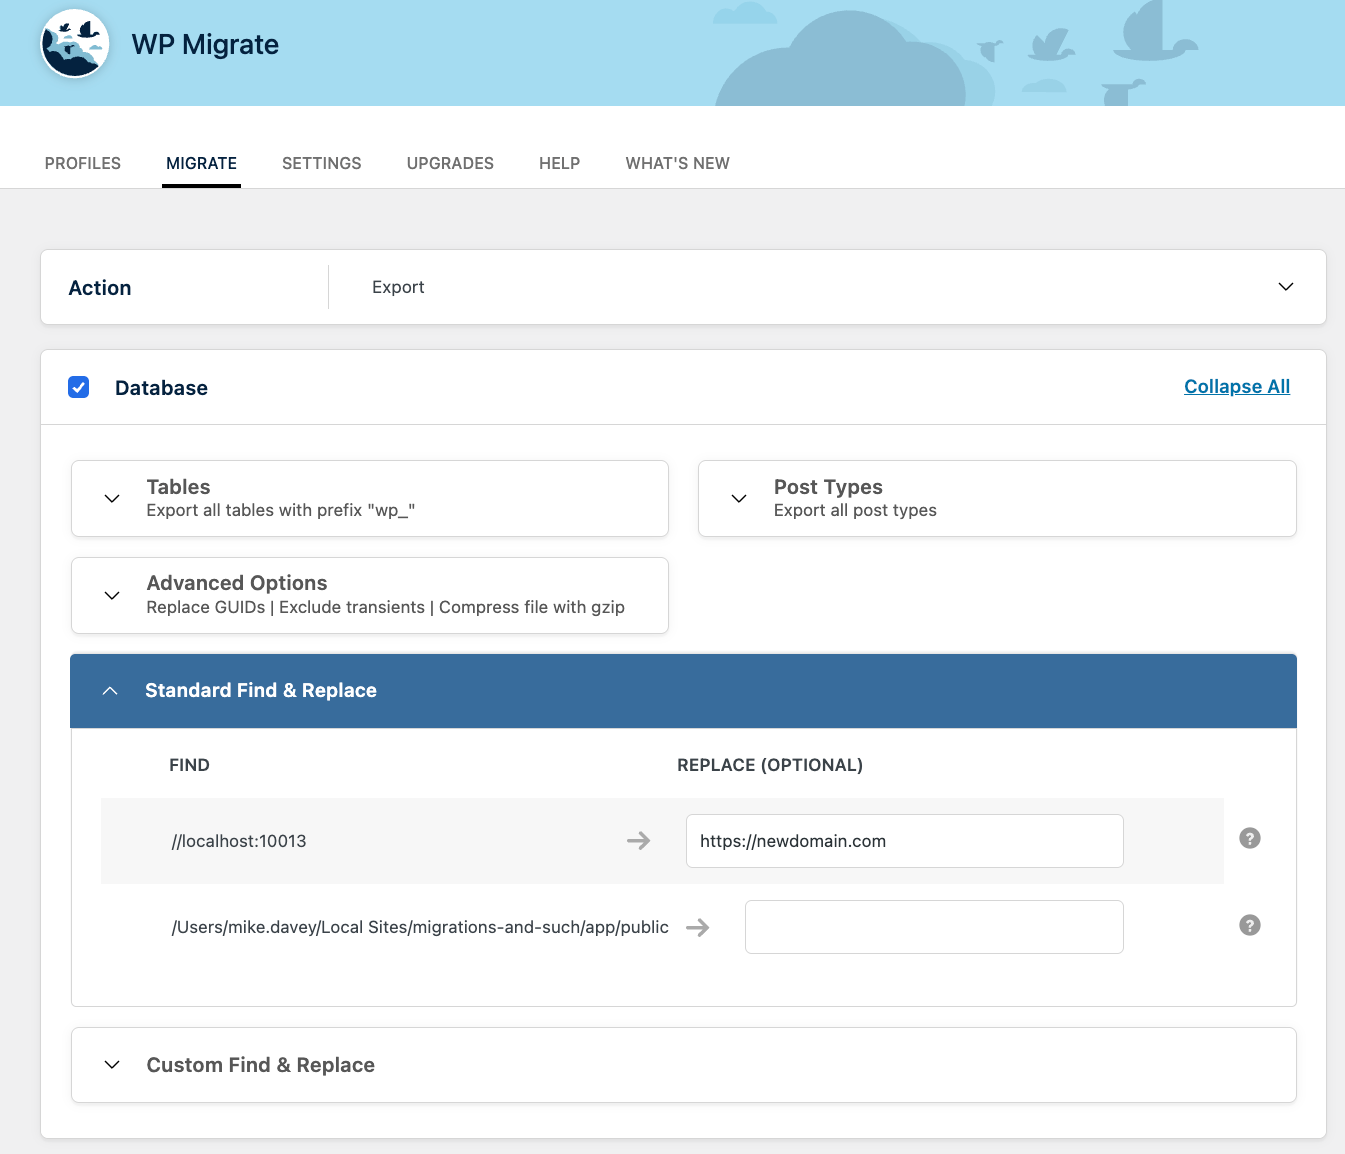
The next step is to configure a “Standard Find & Replace.” The “Find” field should be automatically pre-filled with your current (i.e., old) domain’s URL. In the “Replace” field, carefully enter the full URL of your new domain, ensuring you include the correct protocol (http or https).
WP Migrate Lite will intelligently handle serialized data within your database during this process, which is crucial for preventing data corruption that a simple text search-and-replace often causes.
You can also set a different path for your new domain. This isn’t necessary in most cases, as WP Migrate Lite will automatically set up the new path for you.
Once configured, click the Export button. WP Migrate Lite will process your database, perform the replacements, and generate a SQL file containing your database.
Export Your WordPress Files
After exporting your database, the next step is to export all the necessary files from your old WordPress installation. This includes your themes, plugins, media uploads, and potentially other custom files or WordPress core itself.
Click on the Migrate tab and then select Export again. The “Database” section will be checked by default. Since you’ve already exported and handled your database in the previous step, the first action here is to uncheck the Database box.
Next, we’ll configure the file exports from the remaining sections.
Media Uploads
This section handles the files within your wp-content/uploads folder. Check the Media Uploads box. A dropdown will then appear offering three options for how to export these files. For a full domain migration where you want all your media to be on the new site, you should select “Export all media uploads”. This option ensures all files from your uploads folder are copied. The other options, “Export new and updated media uploads” and “Export media uploads by date,” are generally more suited for partial content syncs rather than a complete domain transfer.
Themes
This section allows you to export your theme files located in wp-content/themes. Check the Themes box. The accompanying dropdown provides several choices. For a complete domain migration, select Export all themes to ensure every theme from your old site is included. Other options like “Export only active themes” or “Export only selected themes” are available if you have specific needs.
Plugins
Similar to themes, this section manages the export of your plugin files from wp-content/plugins. Check the Plugins box. From the dropdown, select Export all plugins to include all plugins from your old site in the migration package. This section offers the same options as “Themes”, but for plugins.
Other Files
The “Other Files” section is for selecting any additional files or folders found directly within your wp-content directory that are not covered by the “Media Uploads,” “Themes,” or “Plugins” sections. Check the Other Files box. A checklist will then appear, allowing you to manually select individual files or folders you wish to include. These might be custom configurations, uploads outside the standard directory, or other specific assets. None are selected by default, so you must carefully choose any you need.
Each of the “Media Uploads,” “Themes,” “Plugins,” and “Other Files” sections also provides an advanced option to use gitignore patterns to exclude specific files relative to their respective directories. This is useful for highly customized exports where certain files (like cache files or development-specific assets) should not be migrated.
WordPress Core Files
The “WordPress Core Files” section addresses the core WordPress installation itself. Check the “WordPress Core Files” box. Including WordPress core files ensures that the exported archive contains the exact version of WordPress installed on your site, which is particularly helpful when replicating the site precisely in a new environment. This option includes the wp-admin and wp-includes directories, along with various root WordPress files such as index.php, license.txt, readme.html, and crucial configuration files like wp-config.php and wp-config-sample.php.
Once all your desired file sections are configured, click the “Export” button. WP Migrate Lite will package your selected files into a single ZIP archive.
.
Prepare Your New Domain’s WordPress Installation
Before importing your old site’s content, you need a fresh WordPress installation on your new domain to serve as the destination. Ensure your new domain name is pointed to your new hosting environment’s server, and then set up a completely fresh, default WordPress installation on your new domain.
Once the new WordPress site is accessible via your new domain, log in to its admin dashboard and delete any default content (e.g., “Hello world!” post, sample page, sample comment) to provide a cleaner slate for your imported data.
Manually Import the Database to Your New Domain
Now you will replace the fresh WordPress installation’s database on your new domain with the one you exported and modified from your old site.
Access your new domain’s database, typically through a tool like phpMyAdmin via your hosting control panel, or a command-line interface (CLI) if you have SSH access.
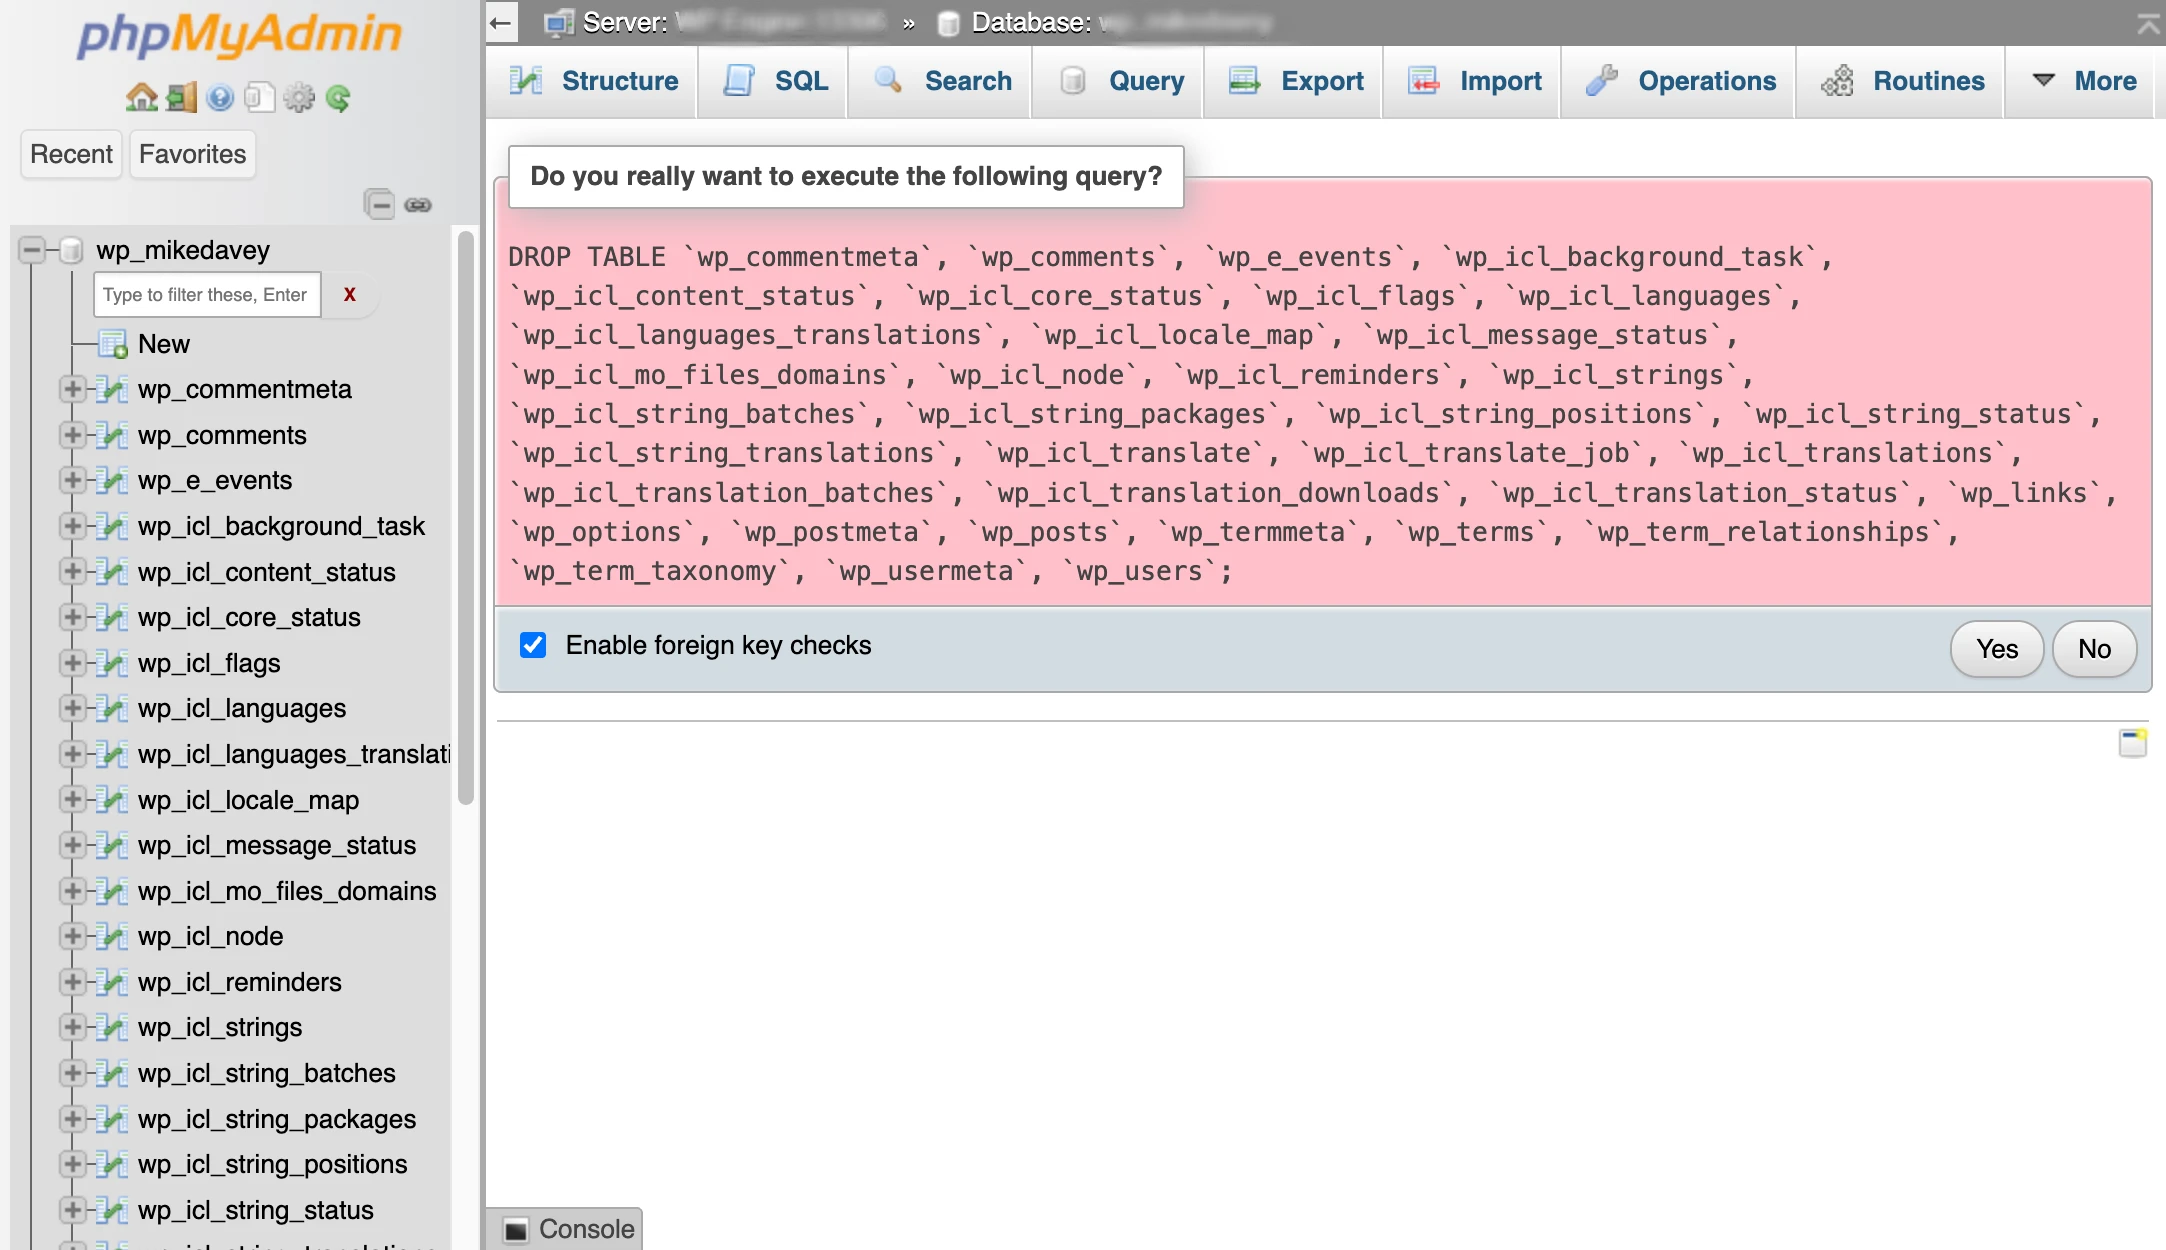
If using phpMyAdmin, select the database associated with your new WordPress installation from the left sidebar. Click on the Structure tab. Scroll to the bottom of the list
and click the checkbox labeled Check all. From the “With selected:” dropdown menu, choose “Drop”. You will receive a confirmation prompt asking if you truly want to execute the DROP TABLE query. Confirm the action. This step is crucial as it clears out the default WordPress tables to make way for your imported data.
Next, go to the Import tab. Click Choose File and select the SQL file you exported with WP Migrate Lite. Ensure the character set and other options are correct (usually the default is fine). Click Import to begin the import.
If using WP-CLI, SSH into your new hosting environment and navigate to your new WordPress installation’s root directory. Ensure your wp-config.php file has the correct database credentials for the new database. Then, run the command: wp db import /path/to/your/downloaded/database.sql (remember to replace /path/to/your/downloaded/database.sql with the actual path to your SQL file, which you’d need to upload via SFTP first). This command will automatically drop existing tables and import your new data.
Manually Transfer Files to Your New Domain
With the database imported, the final step for WP Migrate Lite is to transfer your themes, plugins, and media files to the new domain.
Extract the contents of the ZIP file you downloaded from WP Migrate Lite. This will give you a “wp-content” folder and potentially other root WordPress files. Using an FTP or SFTP client, connect to your new hosting environment and navigate to the root directory of your new WordPress installation.
Upload the wp-content folder from your extracted ZIP file to your new WordPress installation’s root. When prompted, instruct your FTP/SFTP client to overwrite any existing files and folders within wp-content. This will replace the default themes, plugins, and empty uploads folder with those from your old site.
If your old site had custom .htaccess rules, a robots.txt file, or specific modifications to wp-config.php (beyond database credentials), you may need to transfer these files individually from your extracted ZIP’s root directory to the new site’s root. Exercise extreme caution when transferring or merging wp-config.php, as incorrect details will break your site. It is often safer to manually re-add specific customizations to the new wp-config.php rather than replacing the entire file.
Post-Migration Checks and Final Steps
Even with careful execution, some final checks are essential to ensure your site is fully functional on its new domain.
Log in to the new domain’s WordPress admin and navigate to Settings > Permalinks. Without making any changes to the permalink structure itself, simply scroll to the bottom of the page and click the Save Changes button twice. This action flushes WordPress’s rewrite rules, ensuring all your posts and pages are accessible at their new URLs.
Ensure you clear all caches if you had any caching plugins active on your old site, or if your new hosting uses server-side caching. This prevents the site from serving outdated information or getting stuck in redirect loops.
Finally, thoroughly test your new site. Systematically navigate through it, clicking on various posts, pages, and custom post types, testing all navigation menus, checking all images and media files, submitting forms, and verifying plugin functionalities.
Once you are completely satisfied that your site is working perfectly on the new domain, update your domain’s DNS records to point to your new hosting environment’s server. This is the final step that makes your new domain the primary live address for your website. DNS propagation can take up to 24-48 hours.
If your old domain was previously indexed by search engines and you wish to preserve SEO value, it is highly recommended to set up 301 permanent redirects from every URL on your old domain to its corresponding URL on the new domain. This tells search engines that your content has permanently moved.
Streamlining Domain Migrations with WP Migrate
While WP Migrate Lite provides the necessary tools for a successful manual domain migration, the multi-step process involving file transfers, database imports, and manual configurations can be time-consuming and prone to human error, especially for larger sites or frequent domain changes. WP Migrate directly addresses these challenges, offering a highly streamlined and automated workflow that significantly reduces effort and risk.
One advantage of WP Migrate is its direct push and pull functionality for both databases and files. This feature completely bypasses the need for manual download, upload, and import steps. Instead, you establish a secure, direct connection between your source and destination site. From the source site, you can “push” the entire site directly to the new domain, complete with its database, themes, plugins, and media uploads. WP Migrate handles all the underlying complexities, including intelligently performing the necessary URL and path replacements and correctly dealing with serialized data, all in one coordinated operation. This capability dramatically accelerates the migration process and virtually eliminates the risk of errors associated with manual transfers.
WP Migrate’s WP-CLI integration provides a powerful avenue for automation. This means you can initiate and control domain migrations directly from your command line. For those utilizing version control and continuous integration/continuous delivery (CI/CD) pipelines, this allows domain migration steps to be scripted and integrated into automated deployment processes, enhancing efficiency and reliability across your development ecosystem.
Collectively, these premium features transform a potentially tedious and error-prone domain migration into a fast, reliable, and often automated task. By eliminating manual steps and leveraging intelligent, direct site-to-site communication, WP Migrate significantly reduces both the time commitment and the inherent risks involved in moving your WordPress site to a new domain.
Wrapping Up
Relocating a WordPress website to a new domain doesn’t need to be fraught with broken links or lost content. Ensuring a seamless transition where every URL, image, and internal reference correctly points to your new domain is a matter of using the right processes and tools. A systematic approach allows you to confidently manage your WordPress site’s evolution and ensure it thrives on its new home.
Have you migrated a site to a new domain with WP Migrate or another tool? How was the process? Let us know in the comments!
The post Moving WordPress to a New Domain: A Step-by-Step Guide Without Breaking Links appeared first on Delicious Brains.
Click here to continue reading this article.