Flexbox makes it easier than ever to create headers that look clean, adapt beautifully to different screen sizes, and are simple to customize in Divi 5. In this free pack, you’ll find 20 unique Flexbox header designs, each built with Divi 5’s Flex layout system for precise alignment and responsive control. Whether you want to use your site’s existing global styles or start with a ready-made design, you’ll find both options here.
Preview & Live Demo
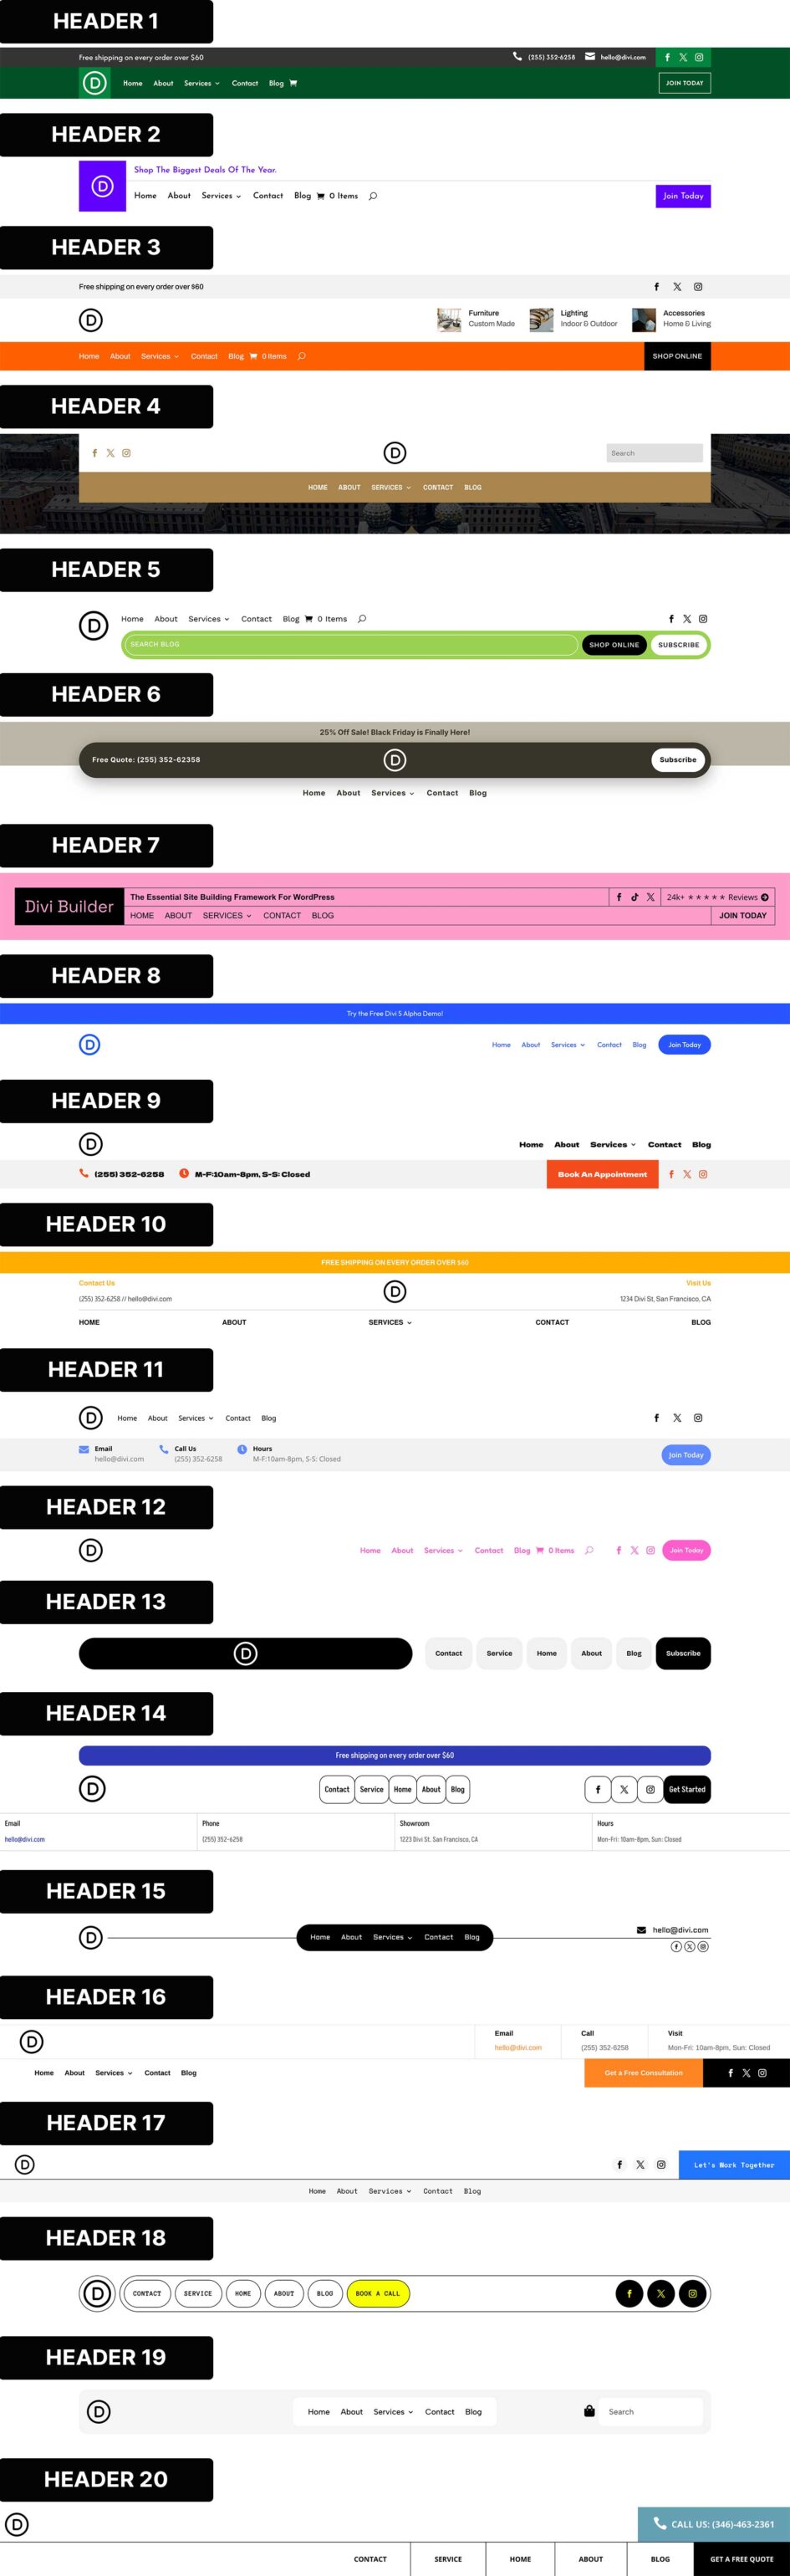
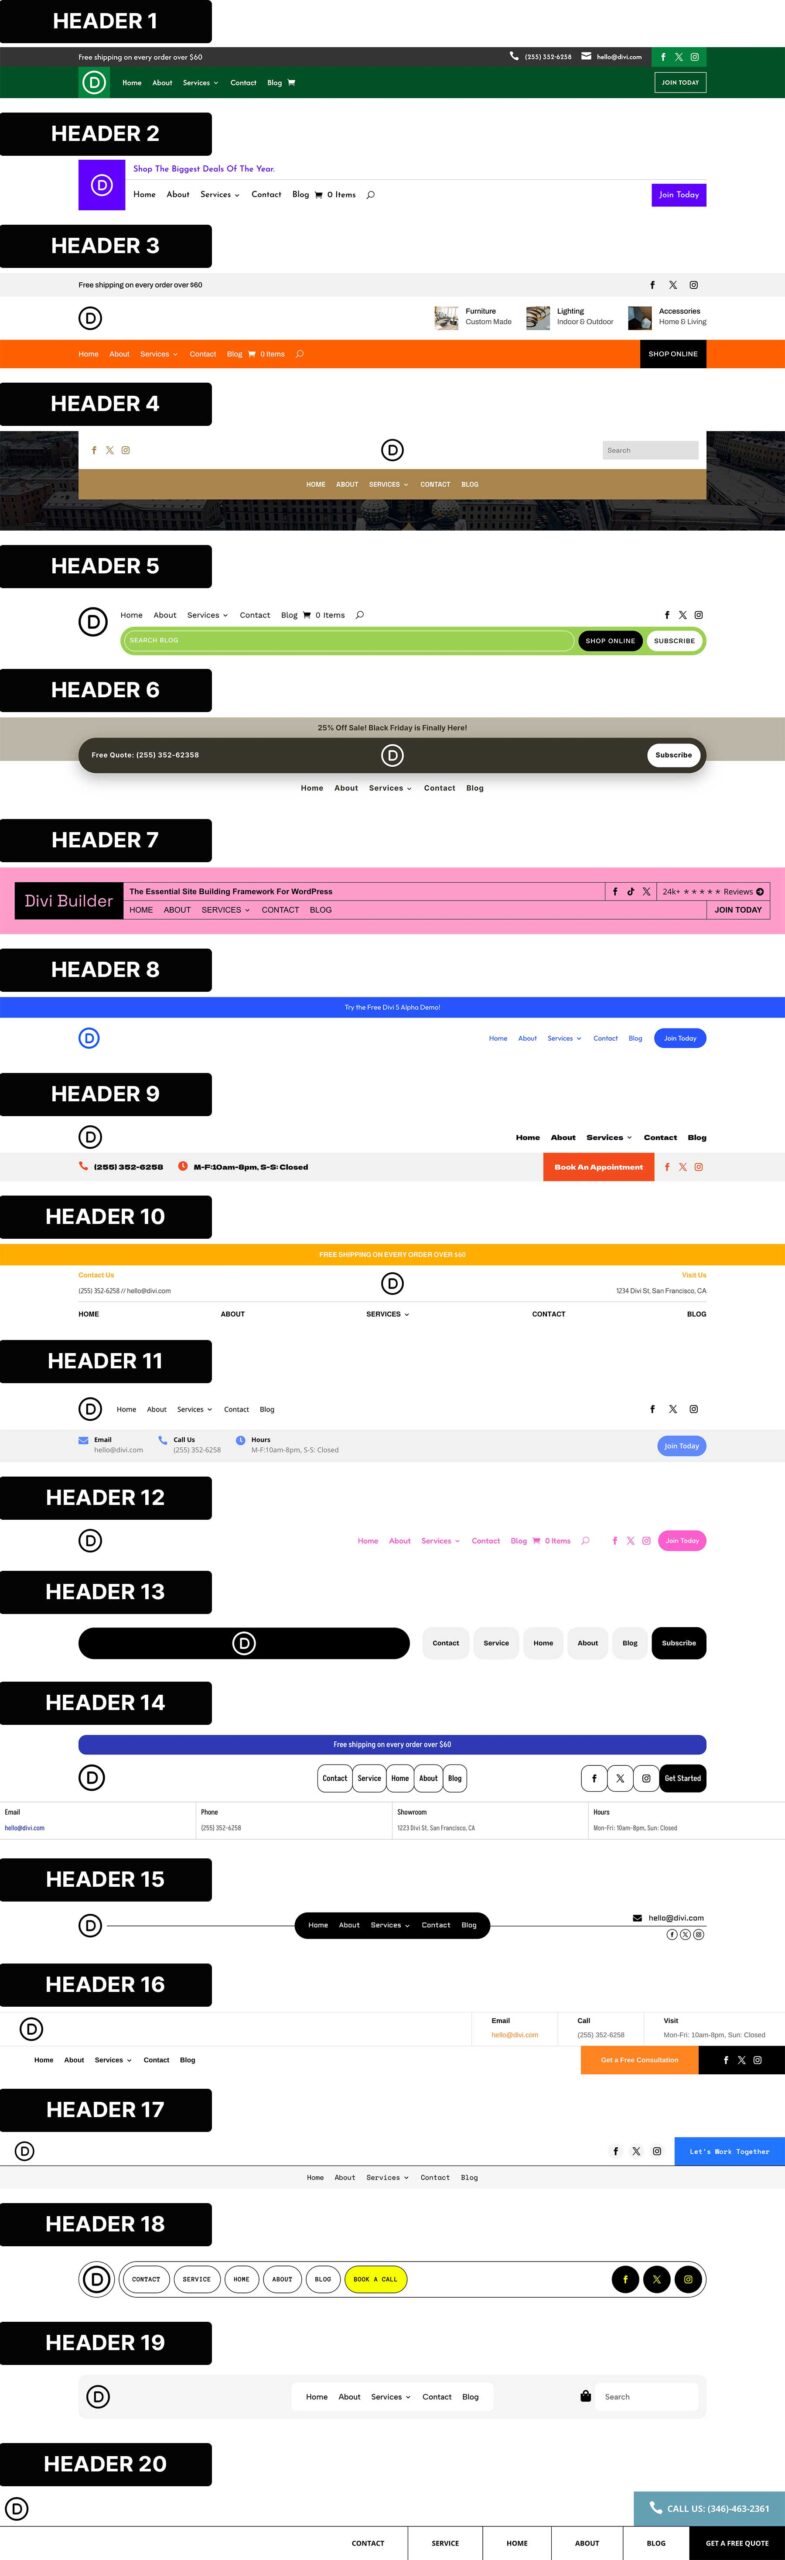
Let’s take a look at all 20 Flexbox Headers in this pack. This pack is free for you to download further down the post.
Subscribe To Our Youtube Channel
Download 20 Flexbox Headers For Divi 5
Get all 20 Flexbox headers for free, including both Default and Prestyled versions. Each header is ready to import into your Divi Library and use in the Theme Builder. Just download and start building.

Download For Free
Join the Divi Newsletter and we will email you a copy of the ultimate Divi Landing Page Layout Pack, plus tons of other amazing and free Divi resources, tips and tricks. Follow along and you will be a Divi master in no time. If you are already subscribed simply type in your email address below and click download to access the layout pack.
You have successfully subscribed. Please check your email address to confirm your subscription and get access to free weekly Divi layout packs!
What’s Included (42 Exports)
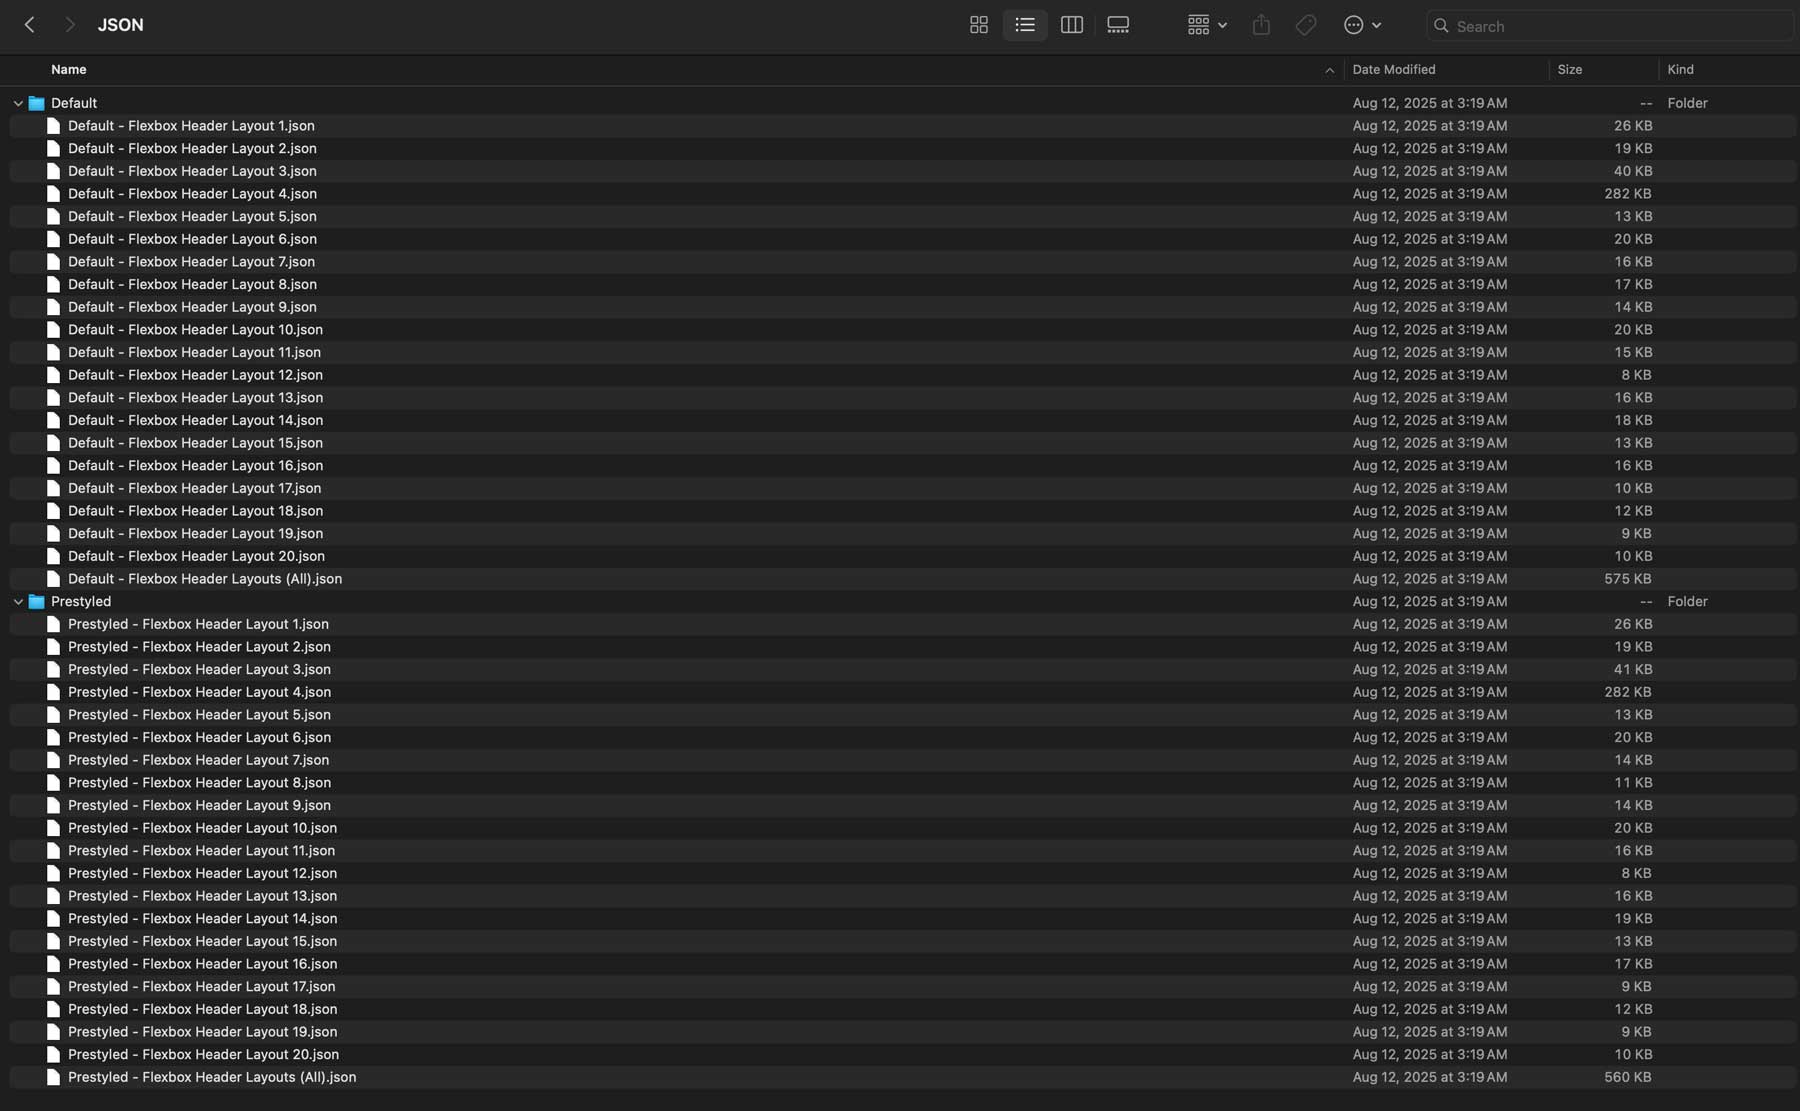
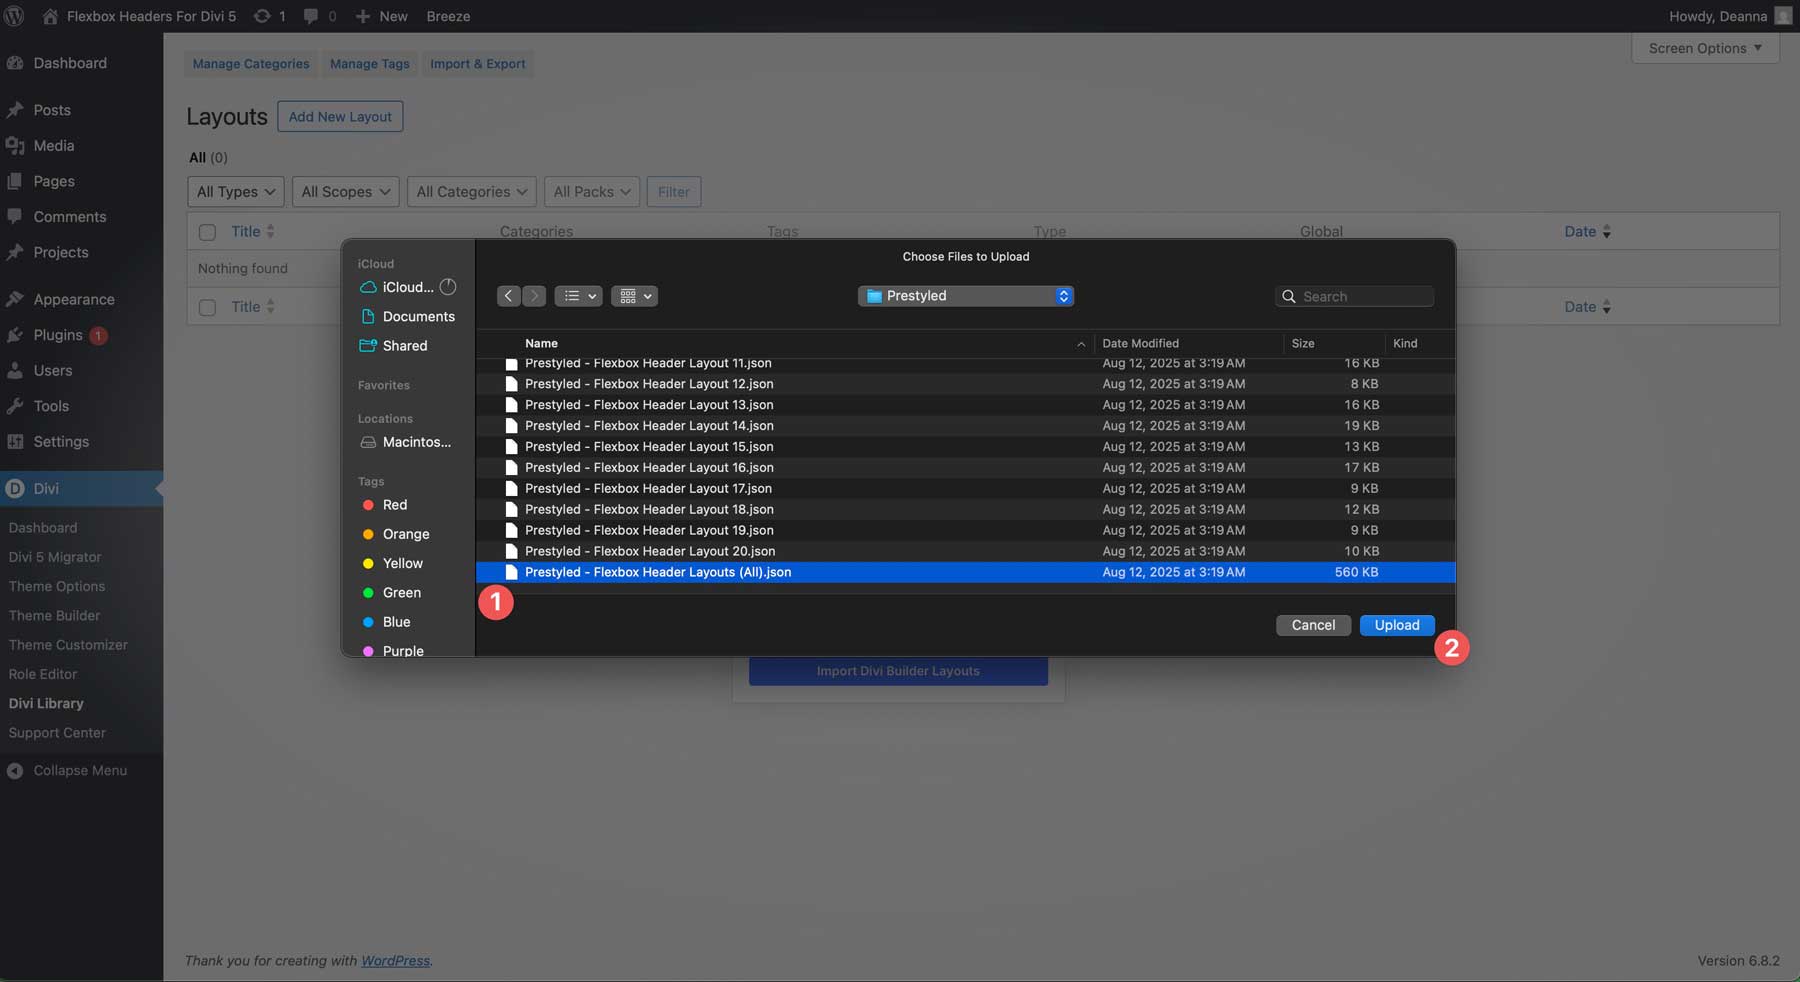
Once you download and unzip the folder, you’ll find all 42 layout exports neatly organized into Default and Prestyled versions as individual headers and as full “All Headers” packs.
Default – Individual Headers (20) → Uses your global styles.
Default – All Headers (1) → Full pack using your global styles.
Prestyled – Individual Headers (20) → Includes inline styling for an instant, ready-made look.
Prestyled – All Headers (1) → Full pack with inline styling applied.
How To Install The Layouts
Keep your download folder close by to start importing them to your Divi website.
1. Import Layouts Into The Divi Library
Go to Divi → Divi Library.
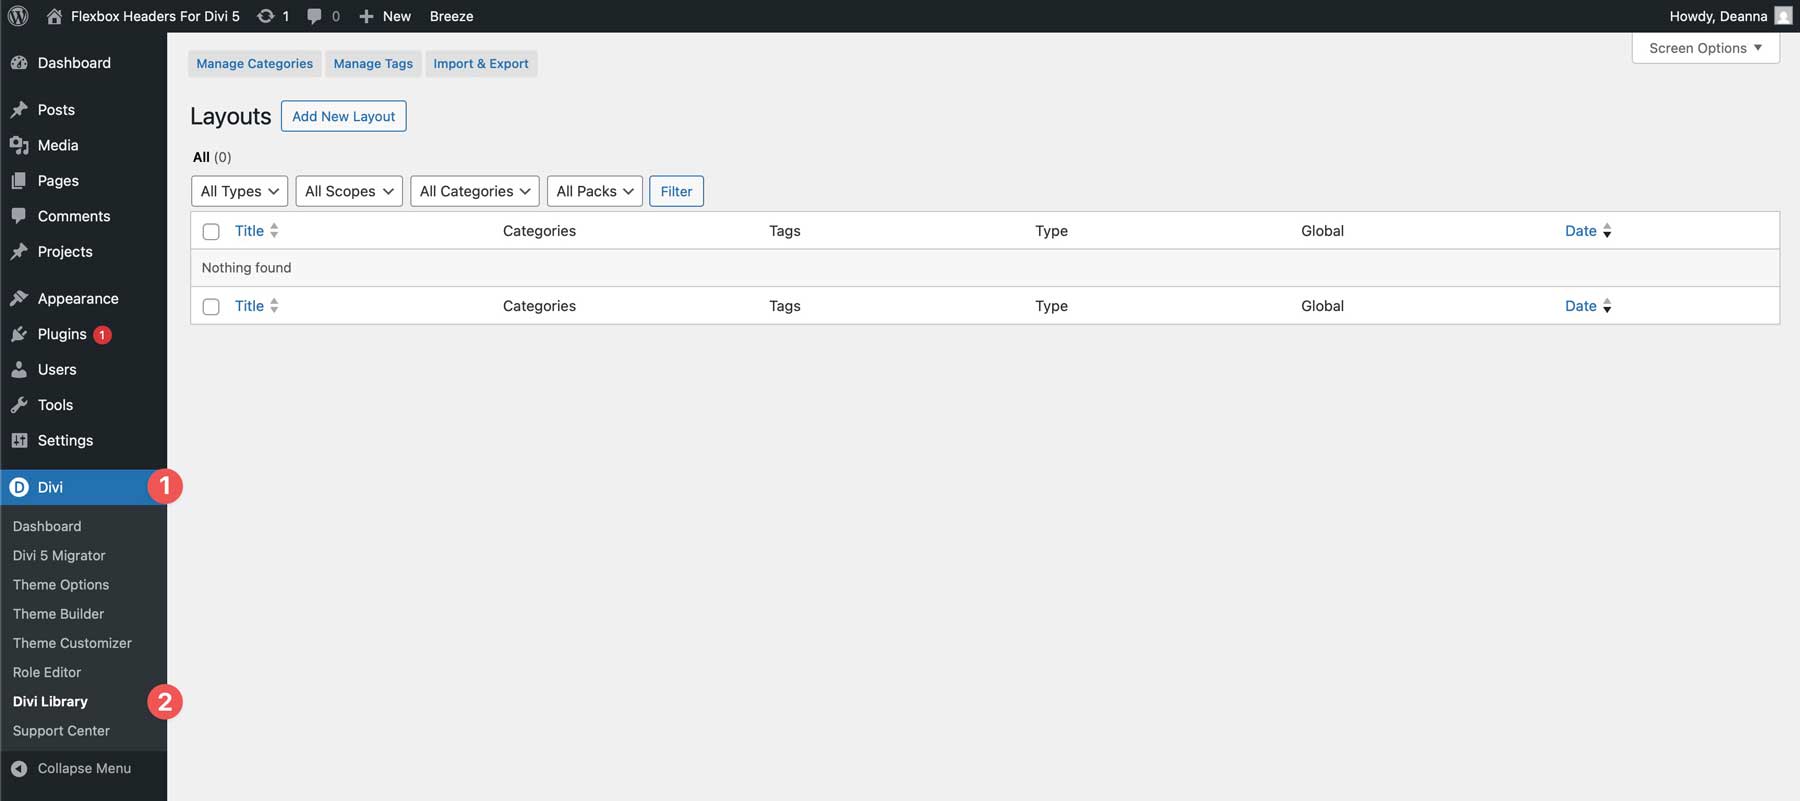
Once there, click the Import & Export button to install the files.
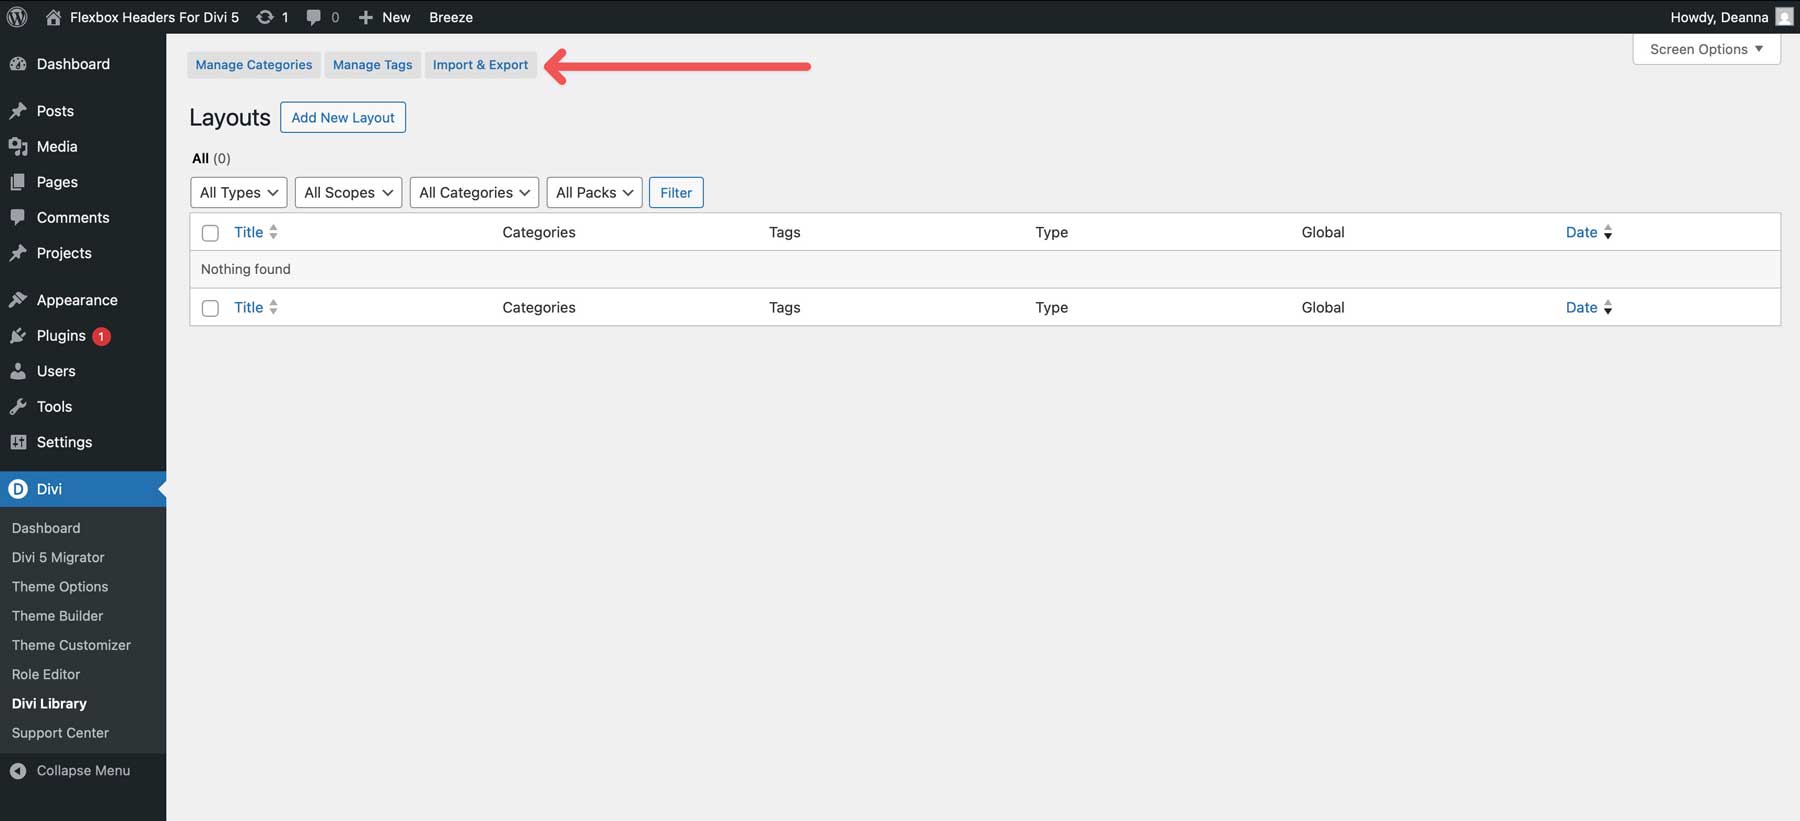
Look for the Flexbox Header Layouts (All) file and click to import it.
2. Create A New Header Template
Go to Divi → Theme Builder.
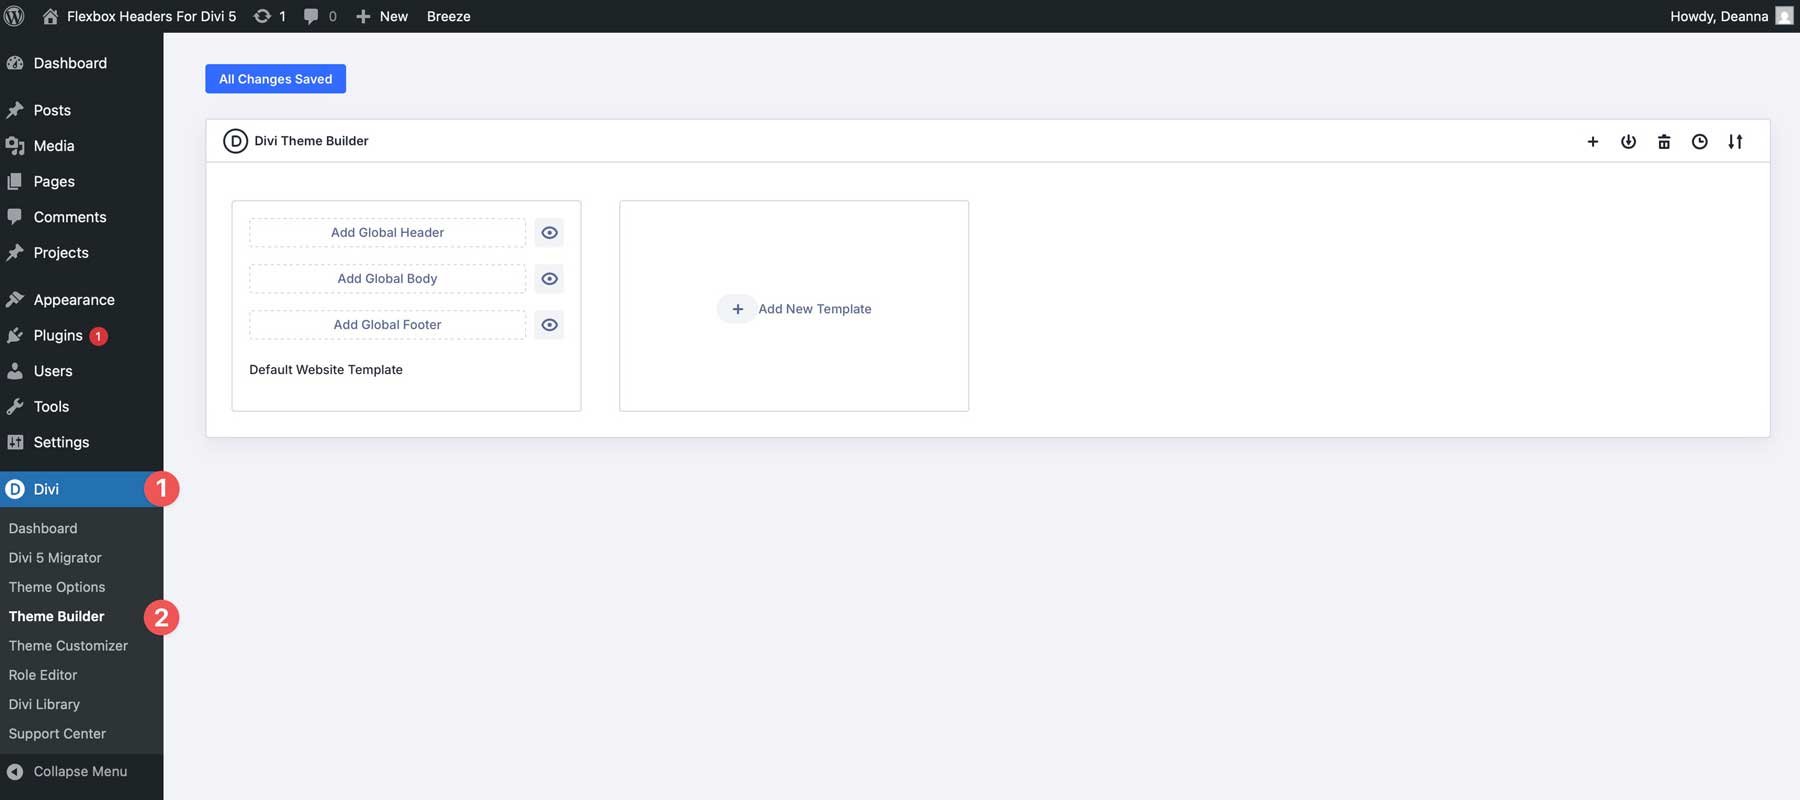
Create a new header template or open an existing one.
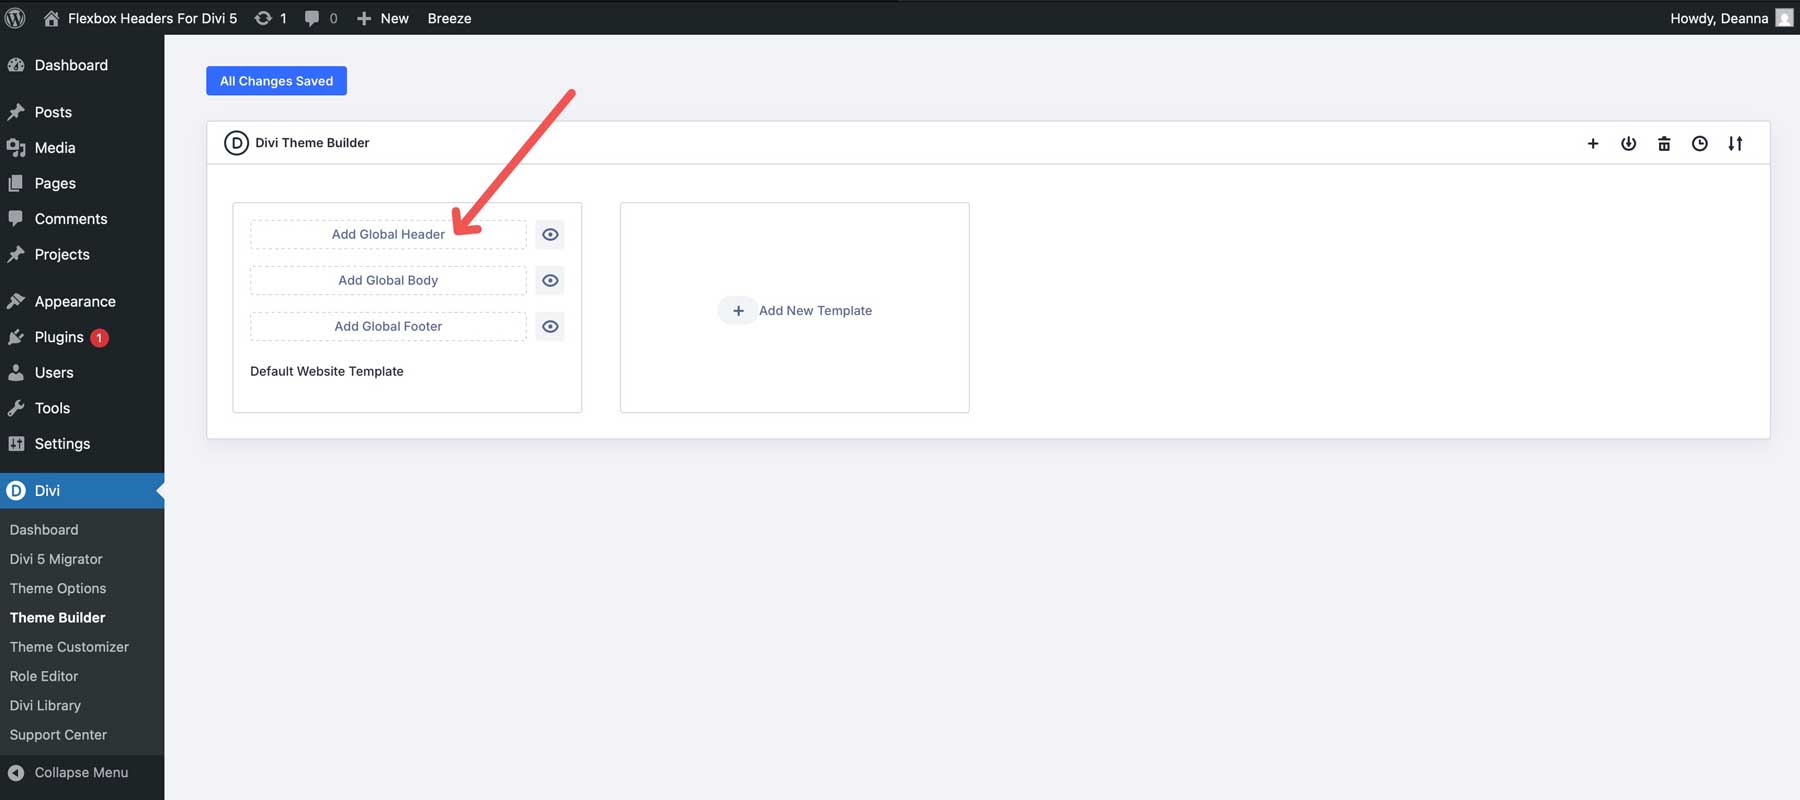
3. Upload Header Layout
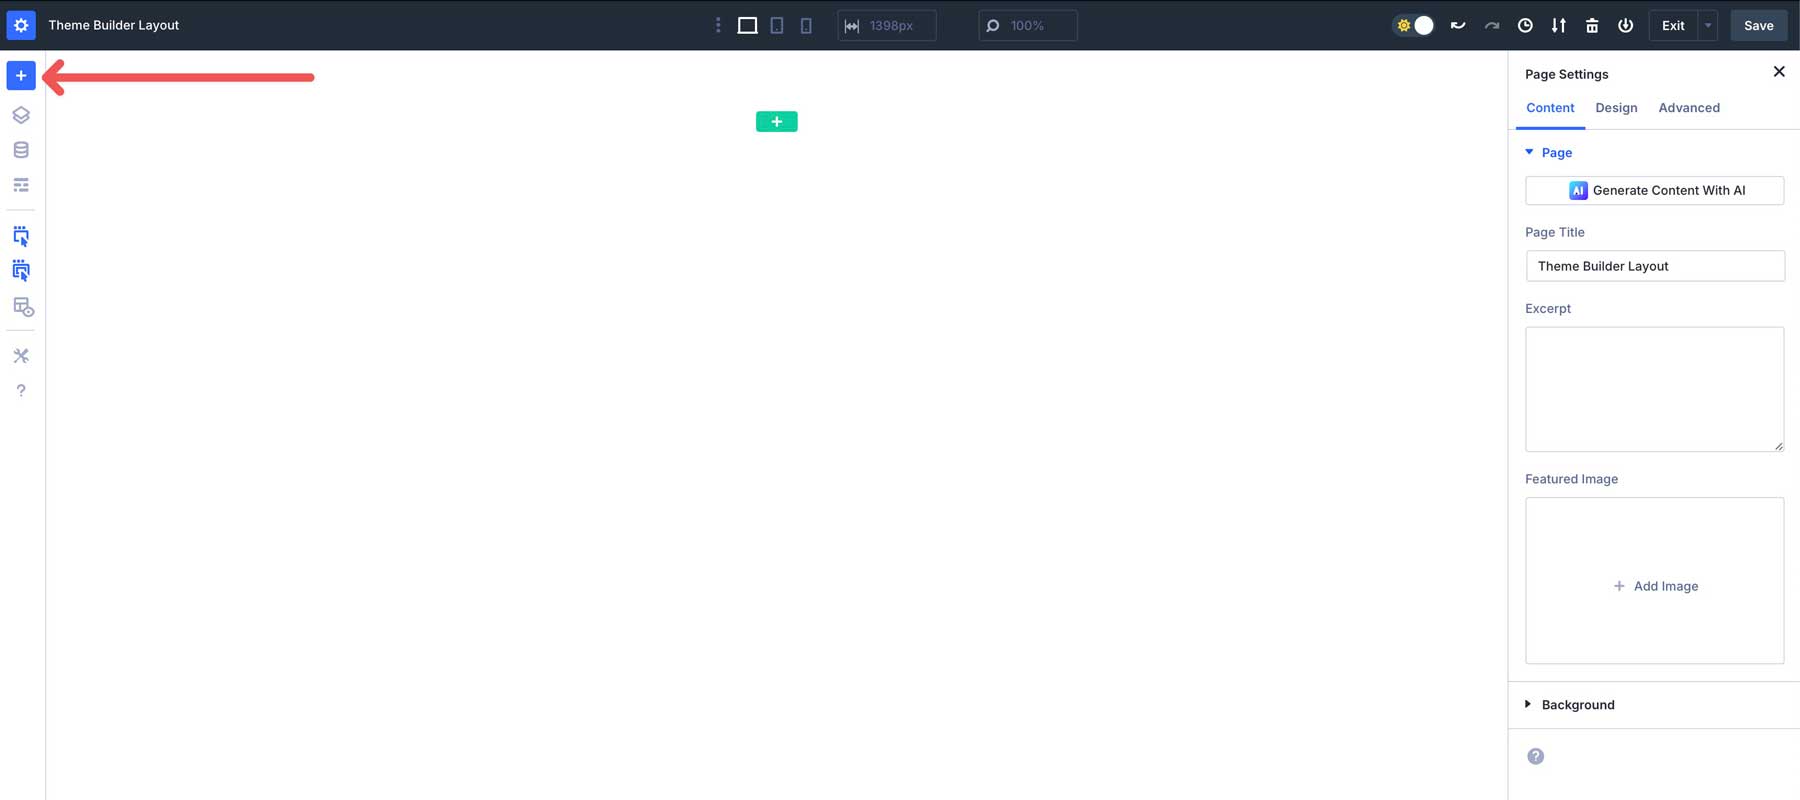
Once you’re inside the header area, you can use the Divi Library to select your header layout of choice. Click the Add Layout button in the top left corner of the Theme Builder.
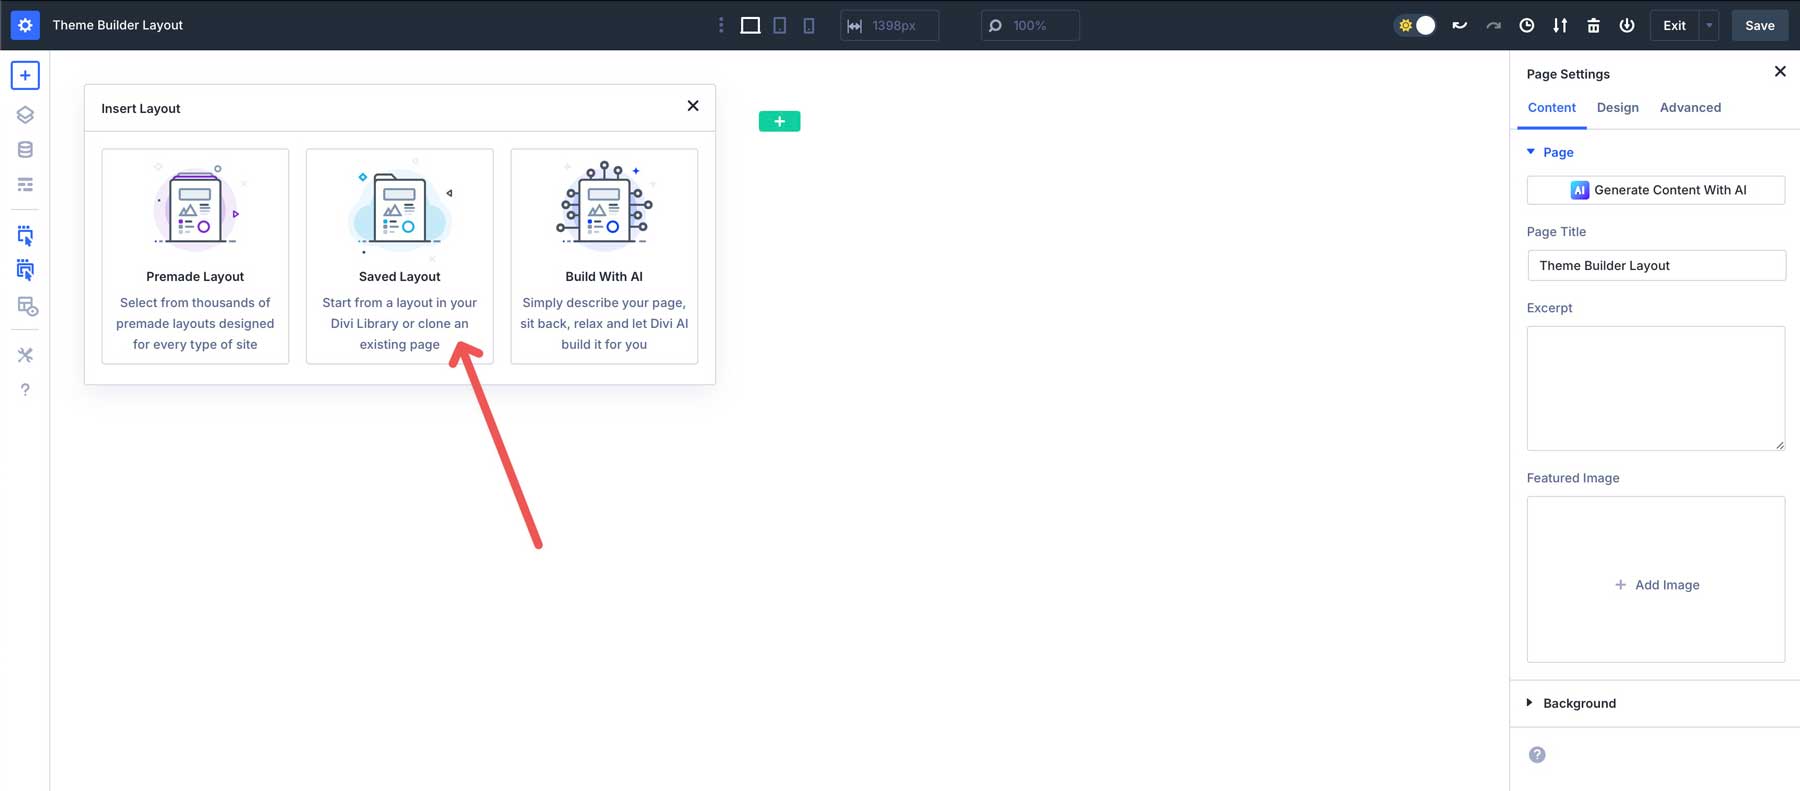
Select Saved Layout.
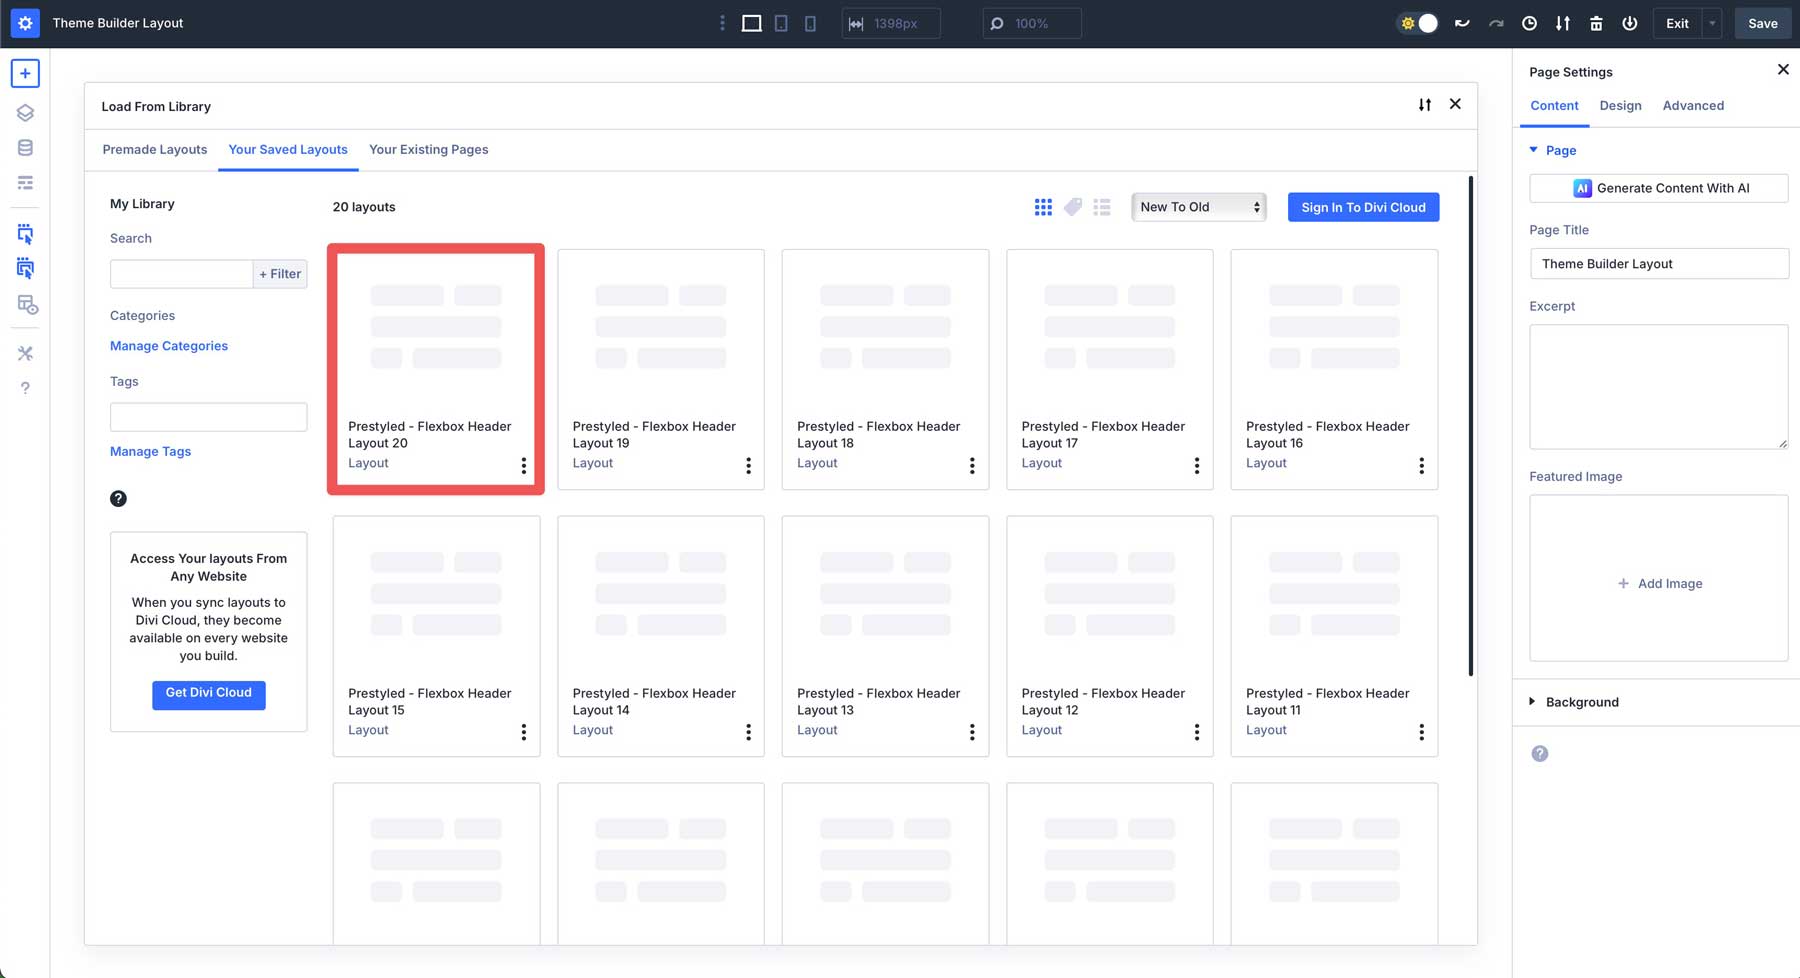
Click the header layout you wish to add to the Theme Builder.
Click the Use This Layout button to load the header.
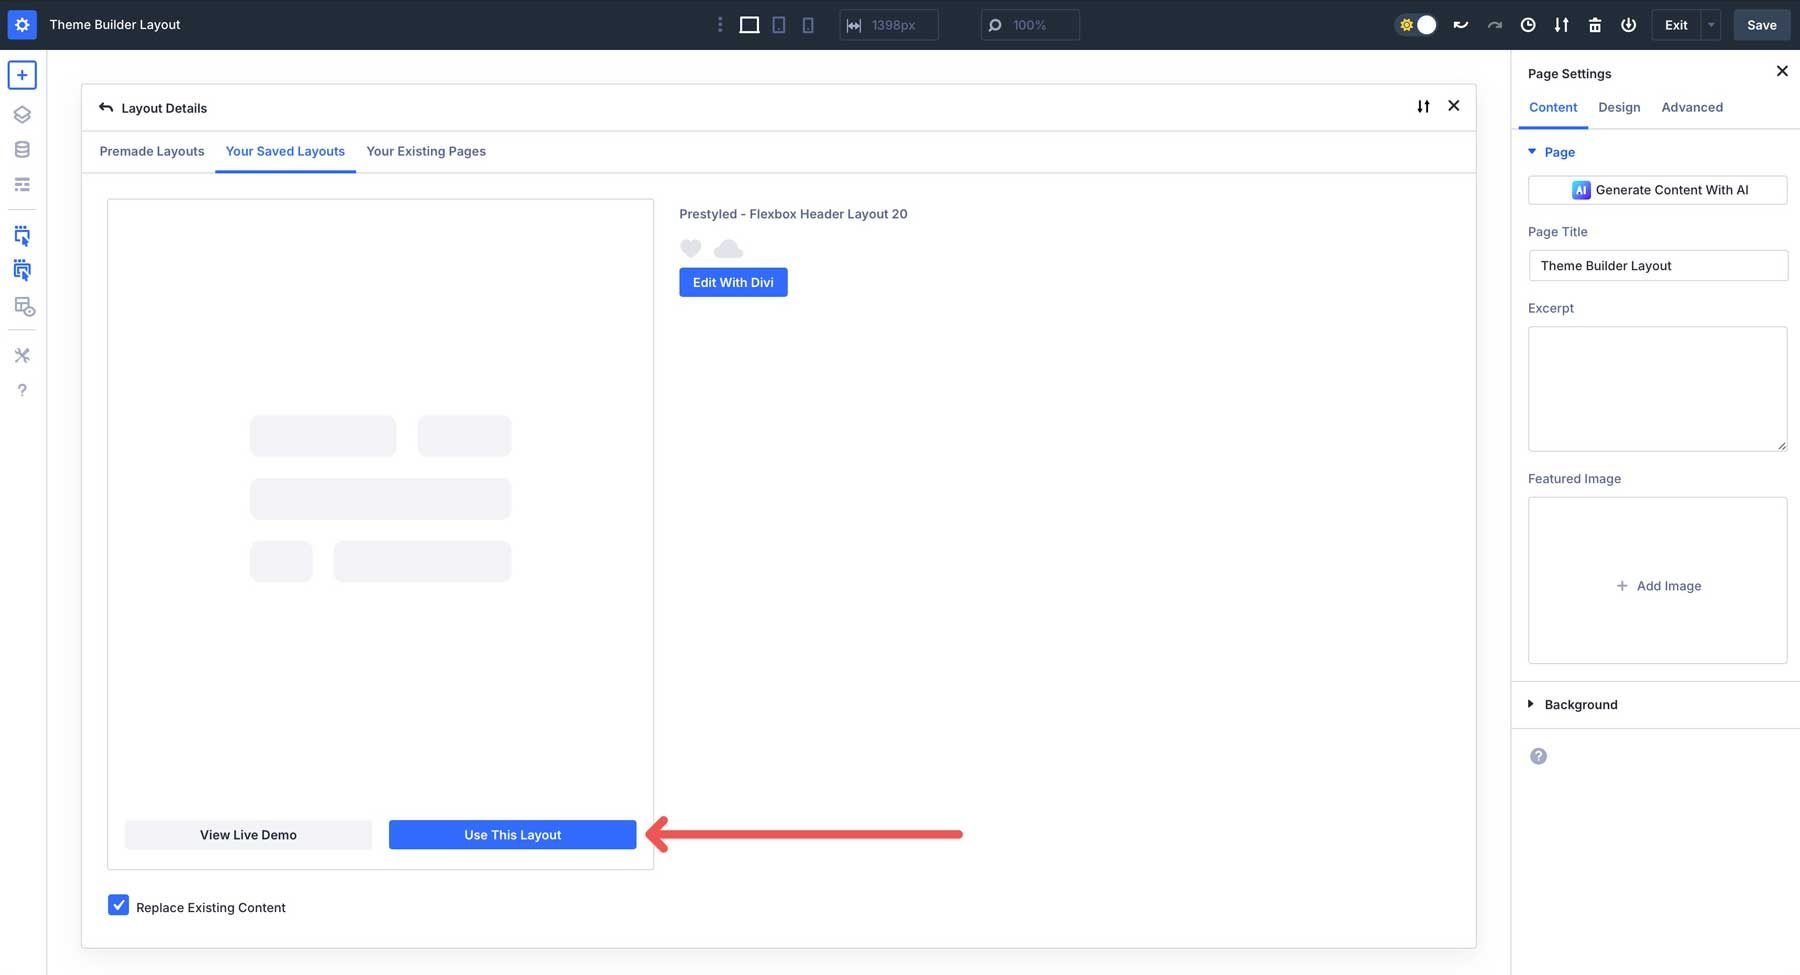
Make sure to save your new header and theme builder changes.
Default vs Prestyled: Which Should You Pick?
When you open the download folder, you’ll see two versions of every header: **Default** and **Prestyled**. They’re built exactly the same way, the difference is in how they handle styling.
Default headers inherit their look from your global styles. Your brand colors, fonts, and button styles are automatically applied. If you’ve already set up your global styles, Default is the quickest way to add these headers to your site and instantly match your design.
Prestyled headers come with all their styles baked in: colors, fonts, and button designs are inline. They look exactly like the previews right out of the box. This is great if you’re building a quick demo, testing ideas, or you want to grab the exact design you see in the screenshots without touching your variables.
In short, go with Default if you want the headers to blend seamlessly with your existing site styles. Pick Prestyled if you want the ready-made look shown in the previews.
Customizing The Headers
Divi 5’s Flexbox Layout System gives you powerful tools to tweak layouts while keeping everything responsive. Here’s how to customize these headers to fit your site’s style.
1. Adjust Flex Settings
Select the row containing the header elements. In the Design tab, locate the Layout dropdown menu. Expand it to reveal the Flexbox settings.
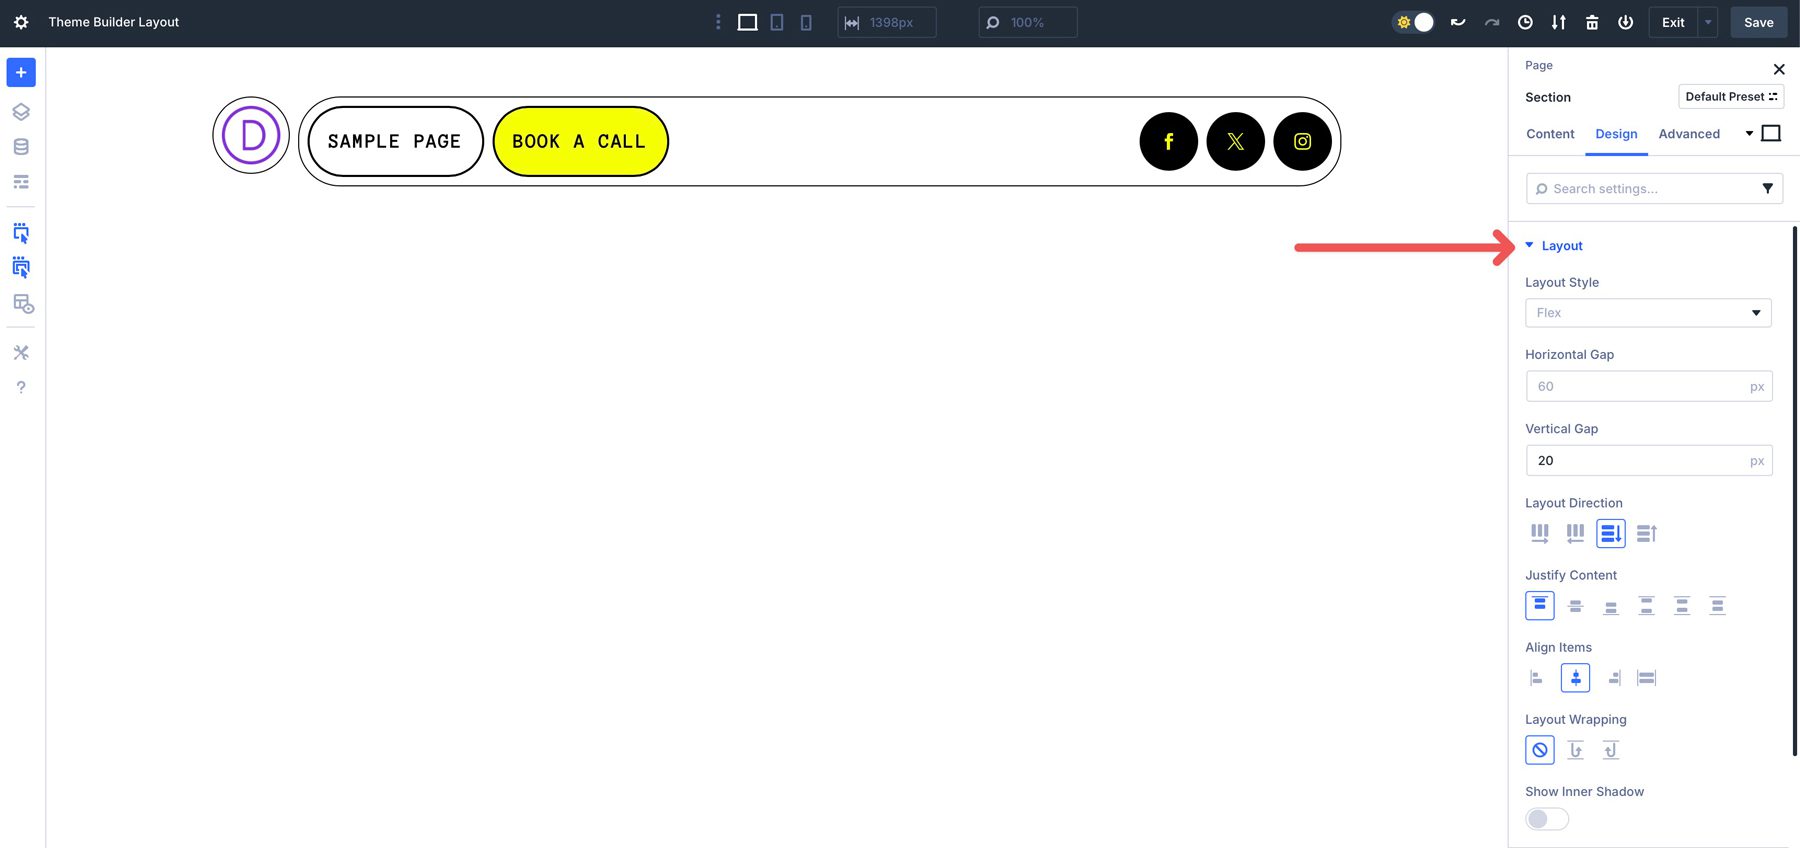
Here, you can change the Layout Direction from Row to Row Reverse, Column, or Column Reverse. This feature allows you to change the direction of your layout.
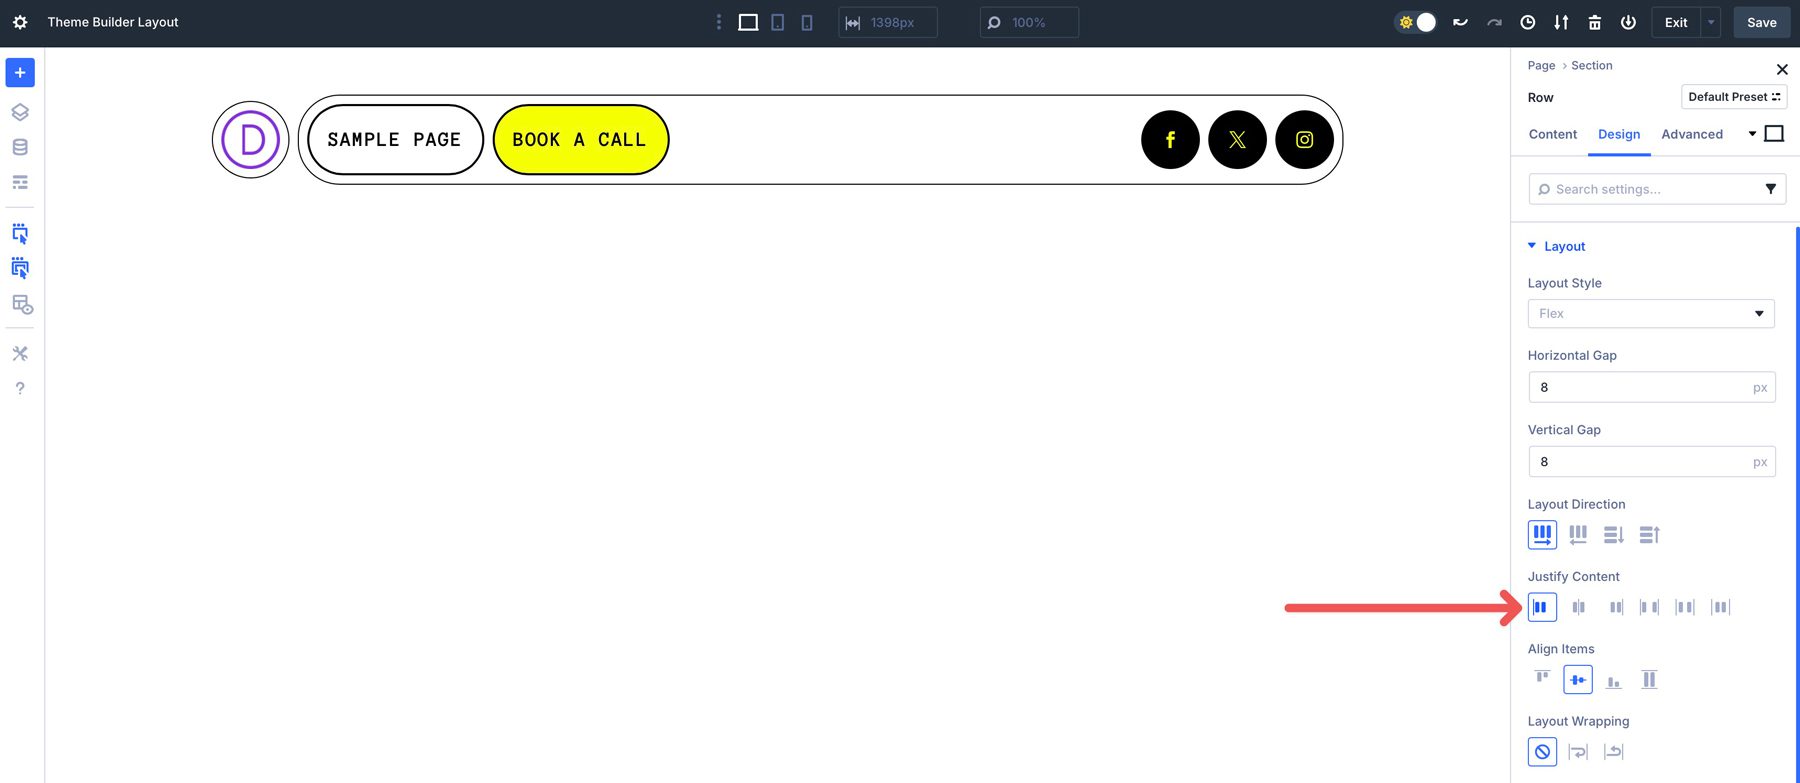
The Justify Content settings allow you to control how flex items are distributed along the main axis — the primary direction of the flex container defined by the Layout Direction. It determines the spacing and alignment of items horizontally or vertically, depending on the Layout Direction.
Align Items allows you to control how flex items are aligned within a column, row, or section. It determines how flex items are positioned relative to each other along the cross-axis within the container. You can choose start, center, end, and stretch.
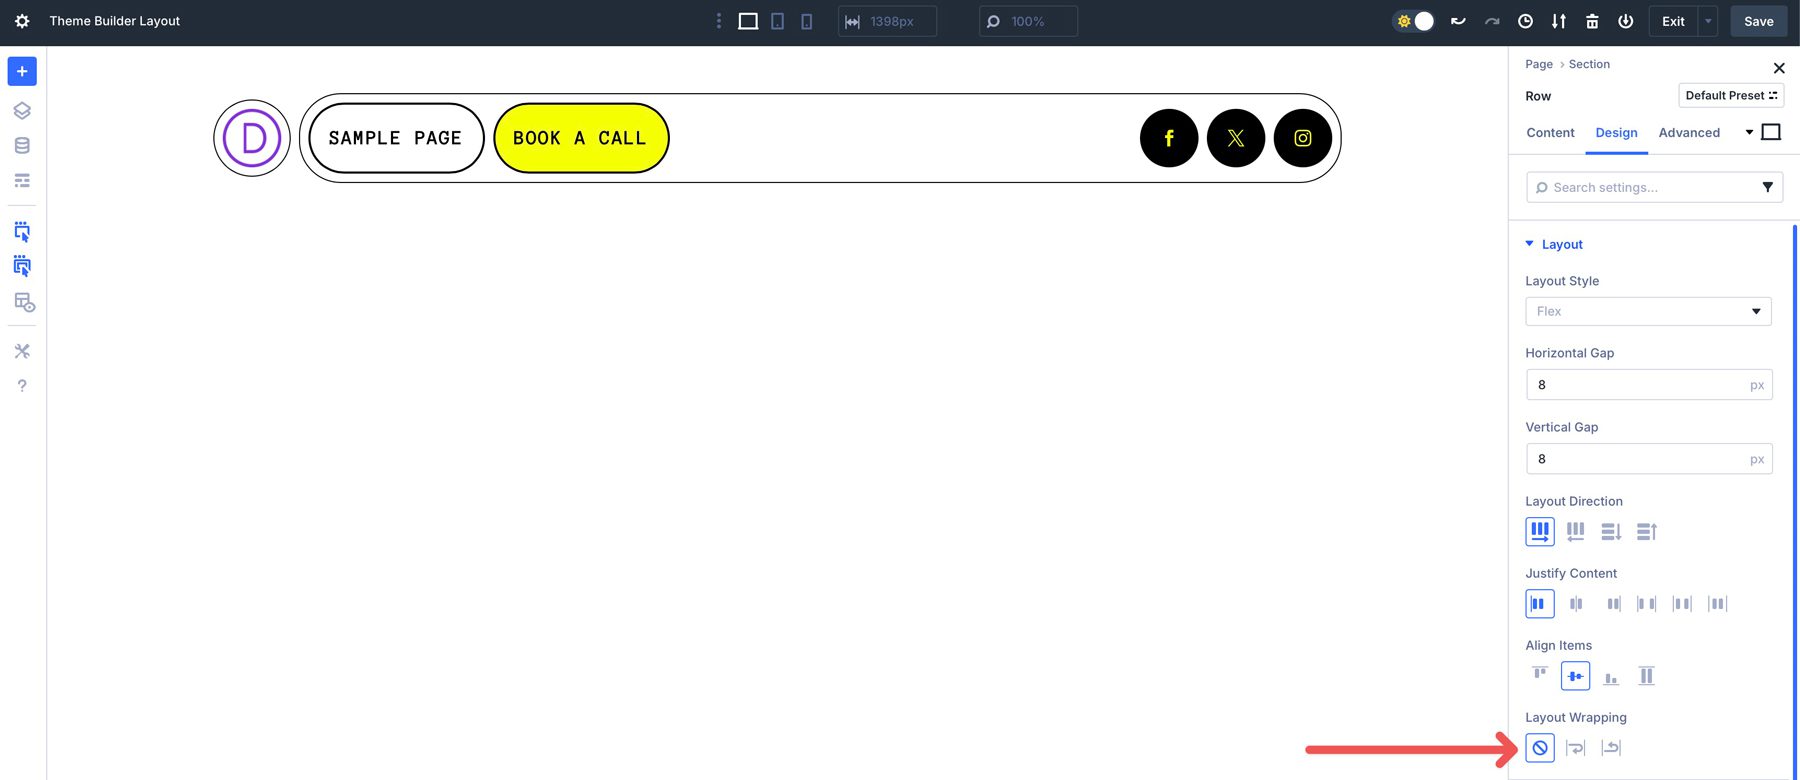
Finally, Layout Wrapping controls whether items in a flex container are forced onto a single line or allowed to wrap onto multiple lines when they exceed the container’s width (or height if Layout Direction is set to column).
2. Show/Hide Elements At Different Breakpoints
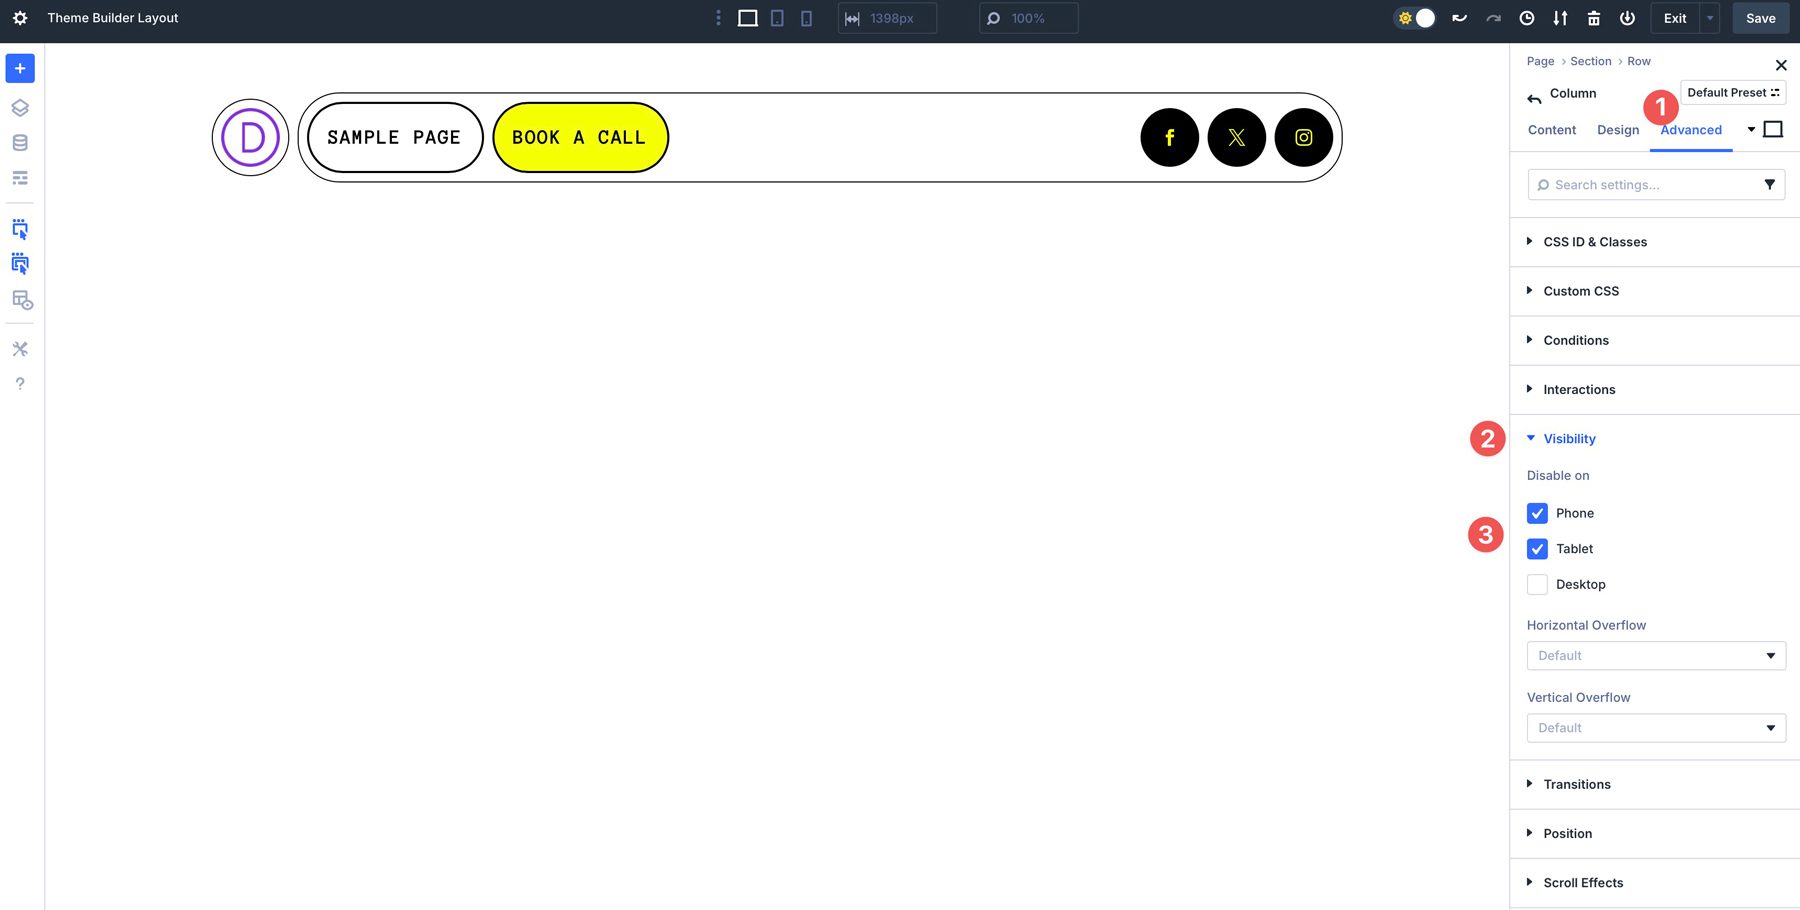
Divi 5 allows you to toggle the visibility of sections, rows, columns, or individual modules at specific breakpoints.. This is useful to simplify layouts on smaller screens, such as hiding a secondary CTA button or replacing a full menu with a mobile one.
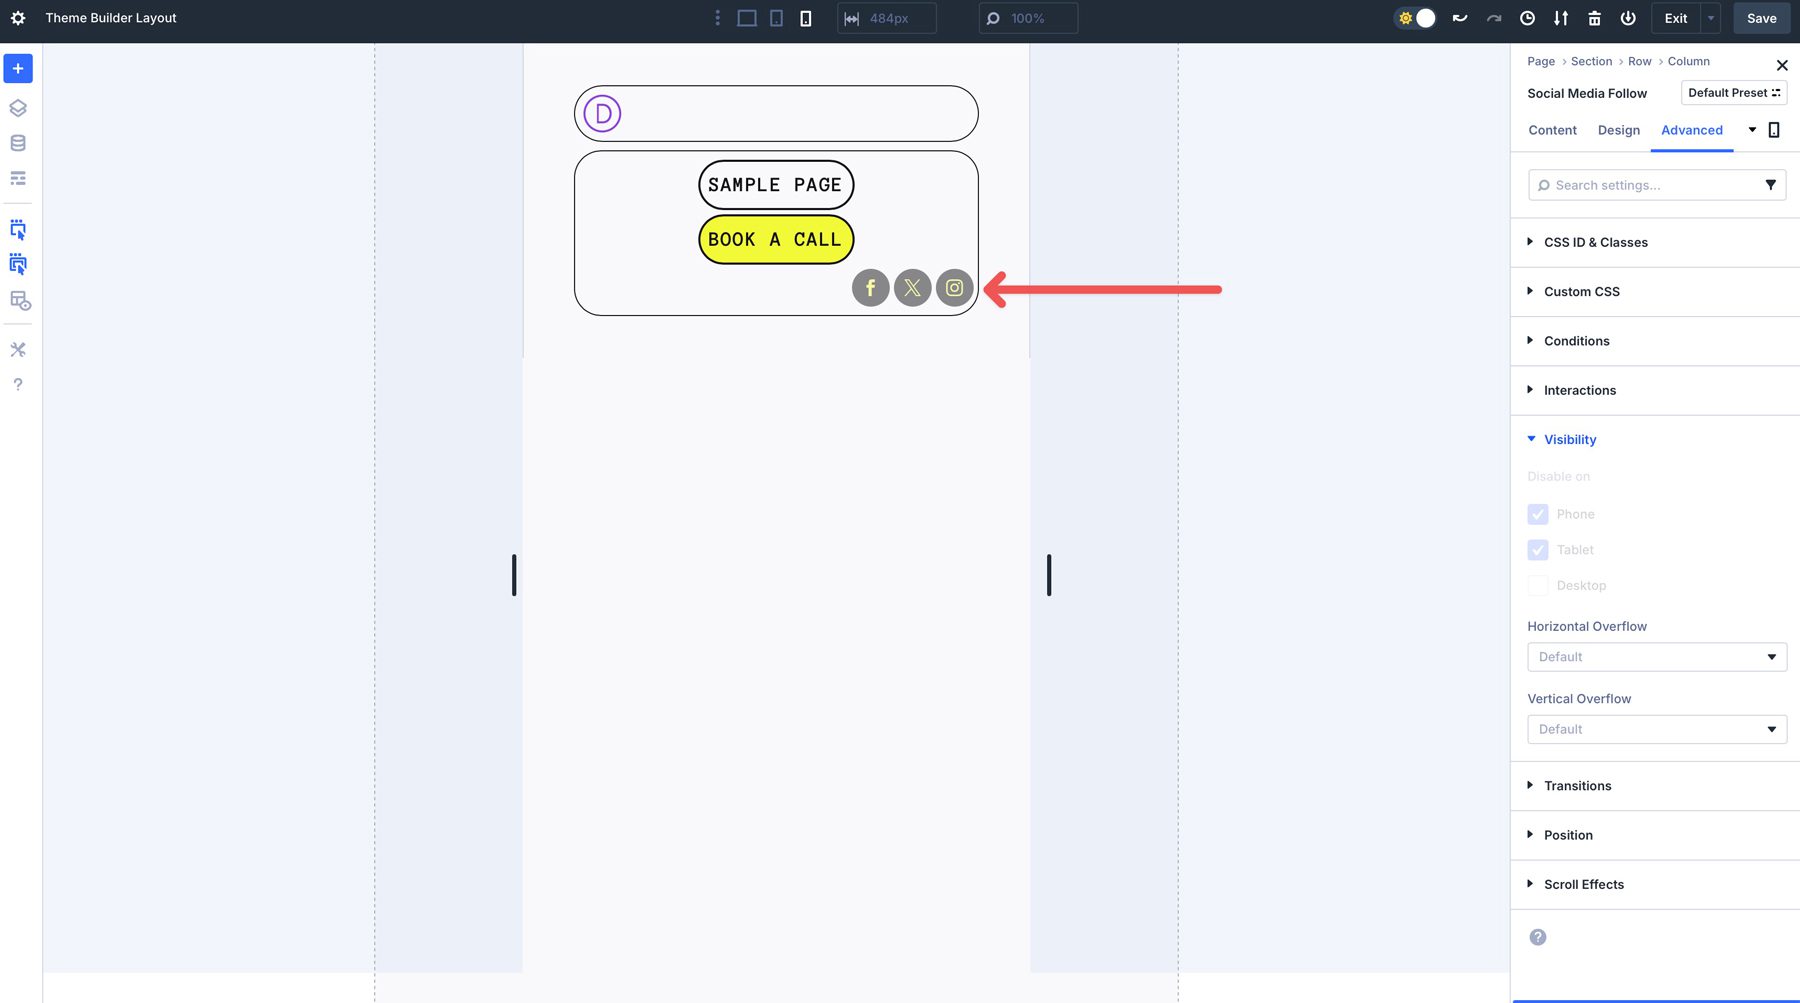
For example, you may want to hide the social media icons in a header to save space on mobile screens. While in the desktop breakpoint, navigate to the advanced tab. Expand the Visibility dropdown menu. Next, click the phone and tablet breakpoints to hide the element.
Use Divi 5’s responsive preview to view the header. When viewing the layout in the phone breakpoint, the hidden element will be visible, but greyed out, indicating it will be hidden on the front end.
3. Add Links Where Necessary
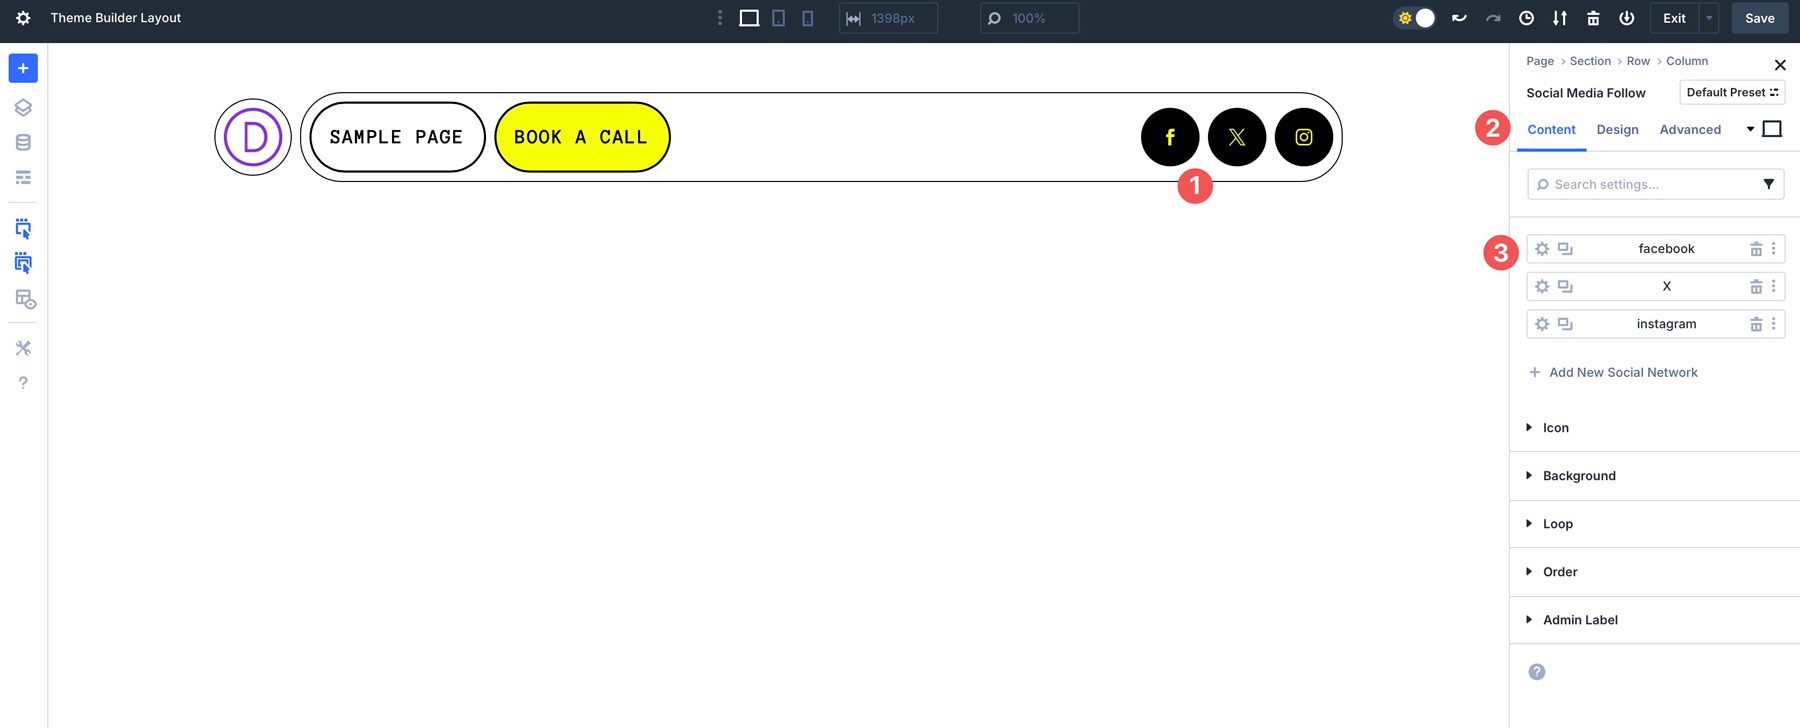
Although every header layout is ready to go out of the box, you’ll still need to add links. In this example, you’d add links to the social media follow module. Click to expand the module’s settings. In the content tab, click on the first social media icon to reveal its settings.
Expand the link dropdown and add the link to your social media account in the Account Link URL field.
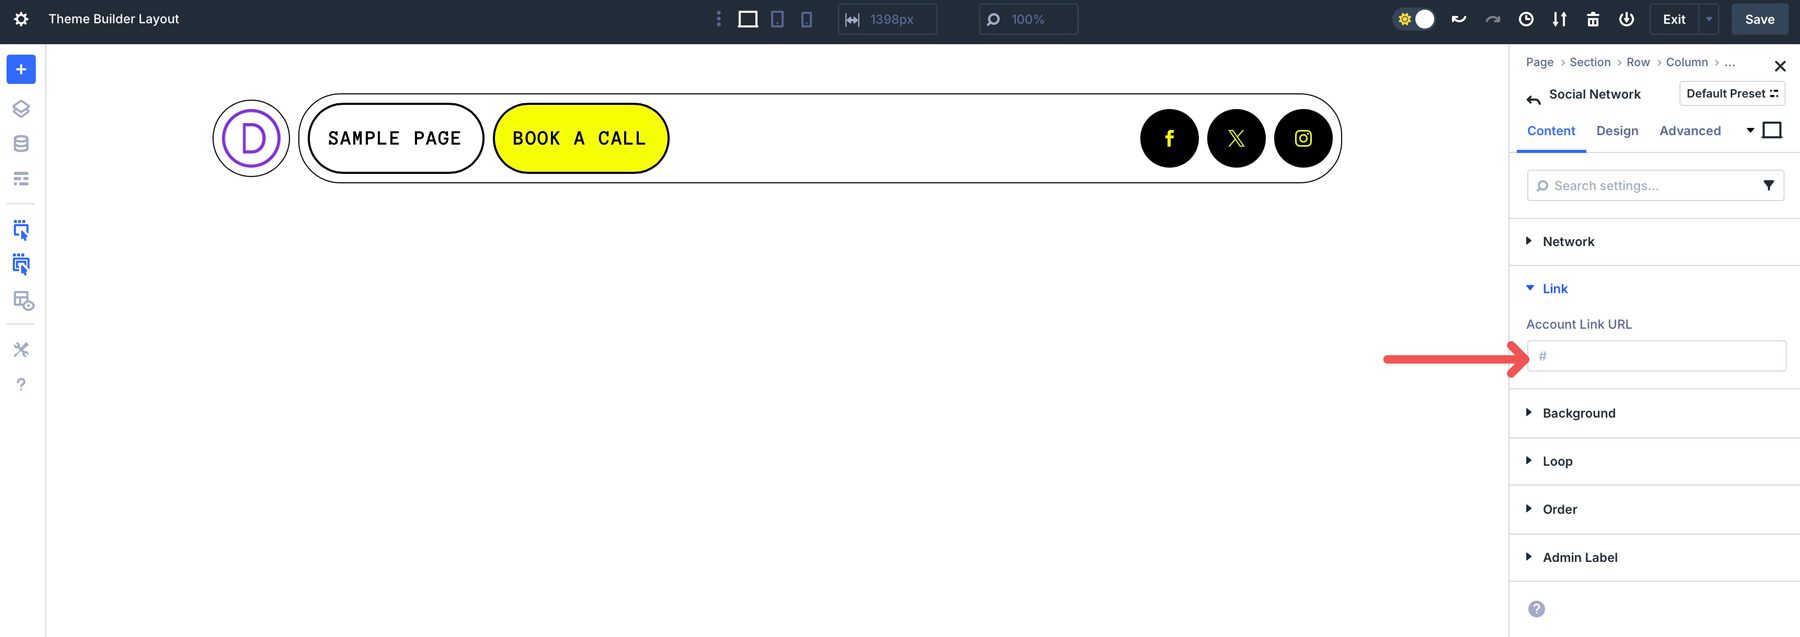
Be sure to save your header before exiting the Theme Builder.

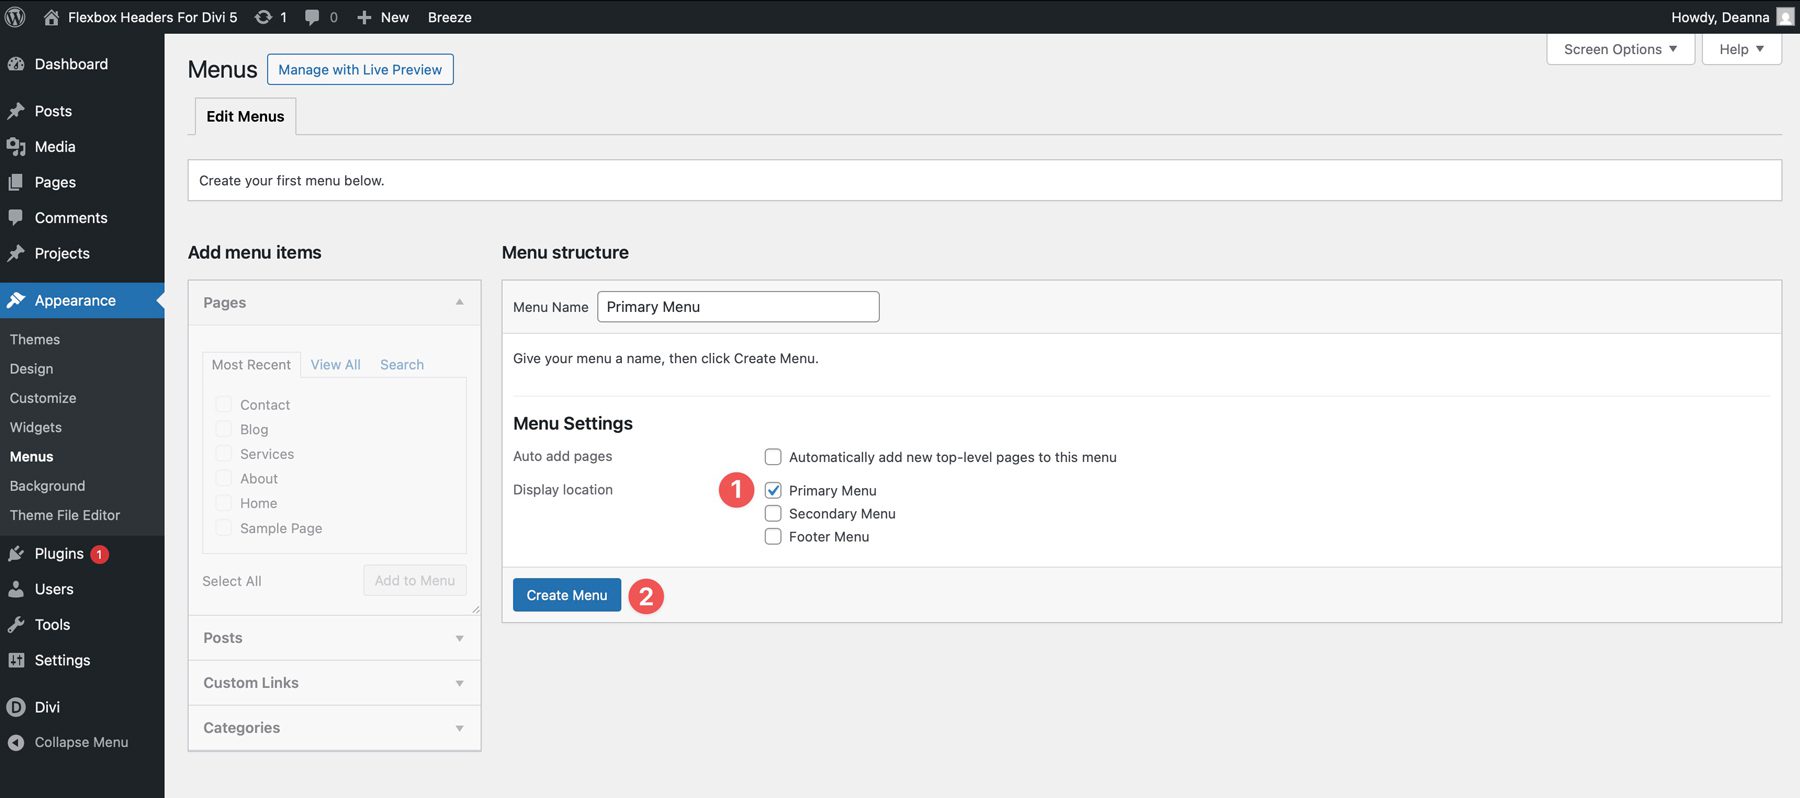
If you haven’t done so already, you’ll need to create a menu for your website. Exit the Visual Builder and navigate to Appearance → Menus. Add a name to the Menu Name field.
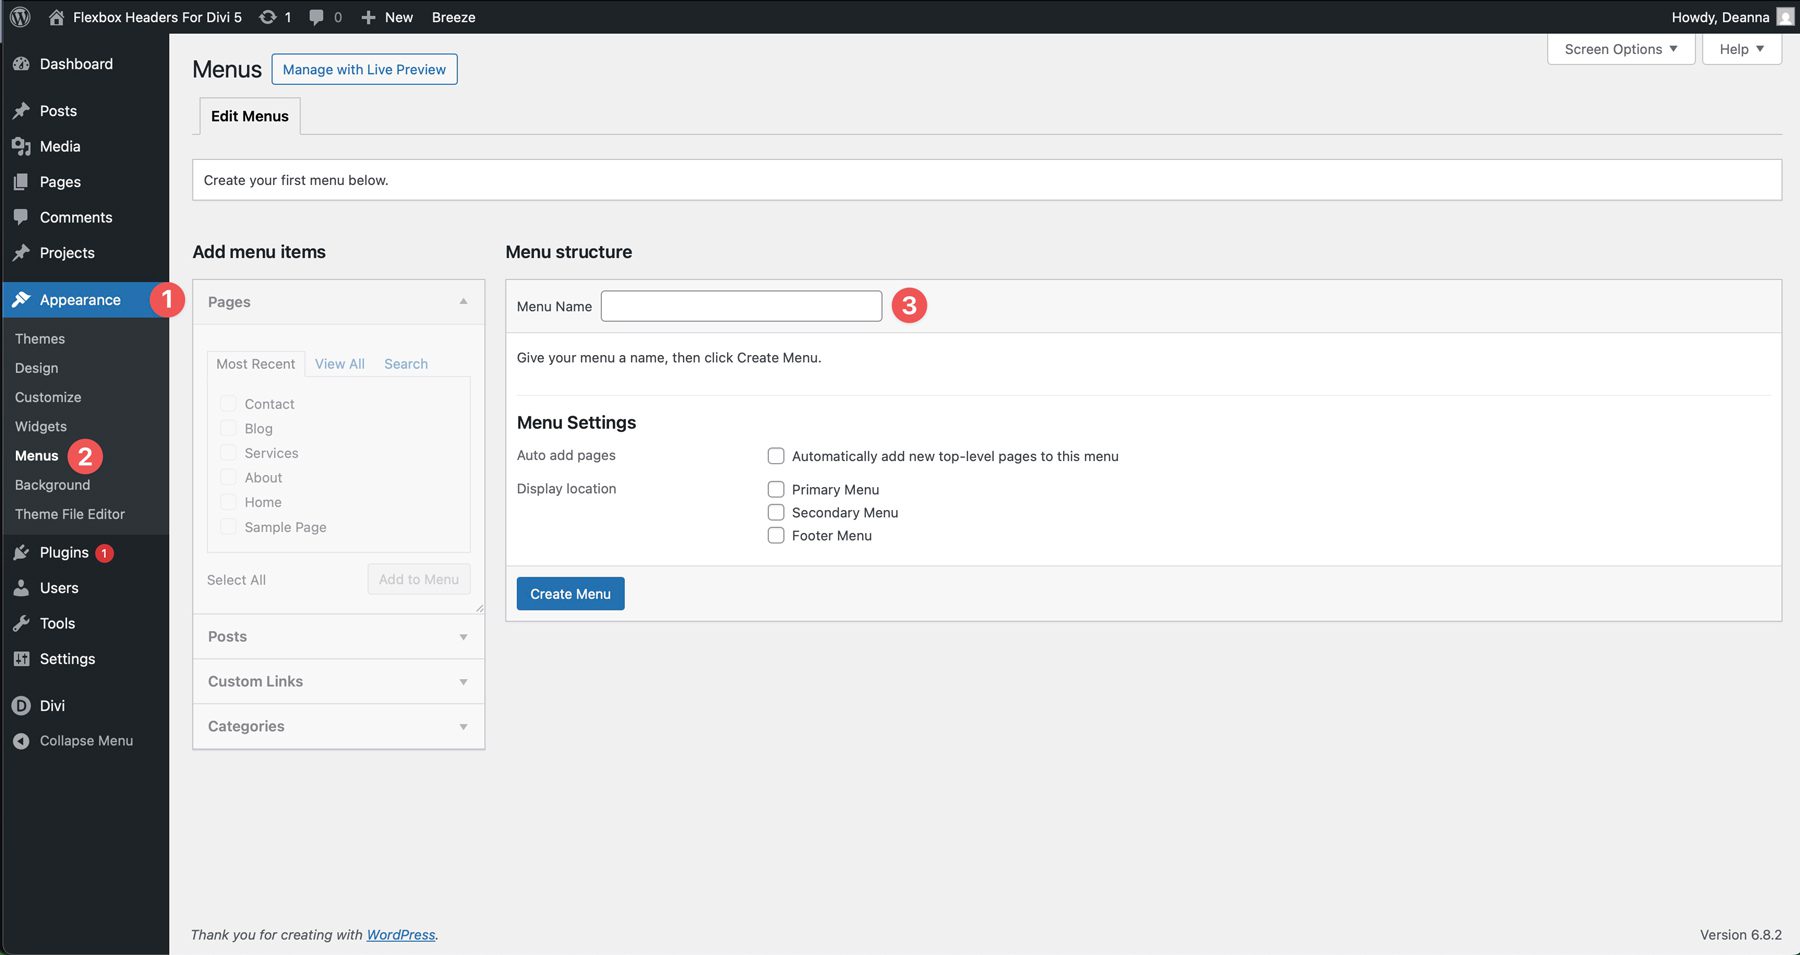
Click the Primary Menu checkbox and then click Create Menu.
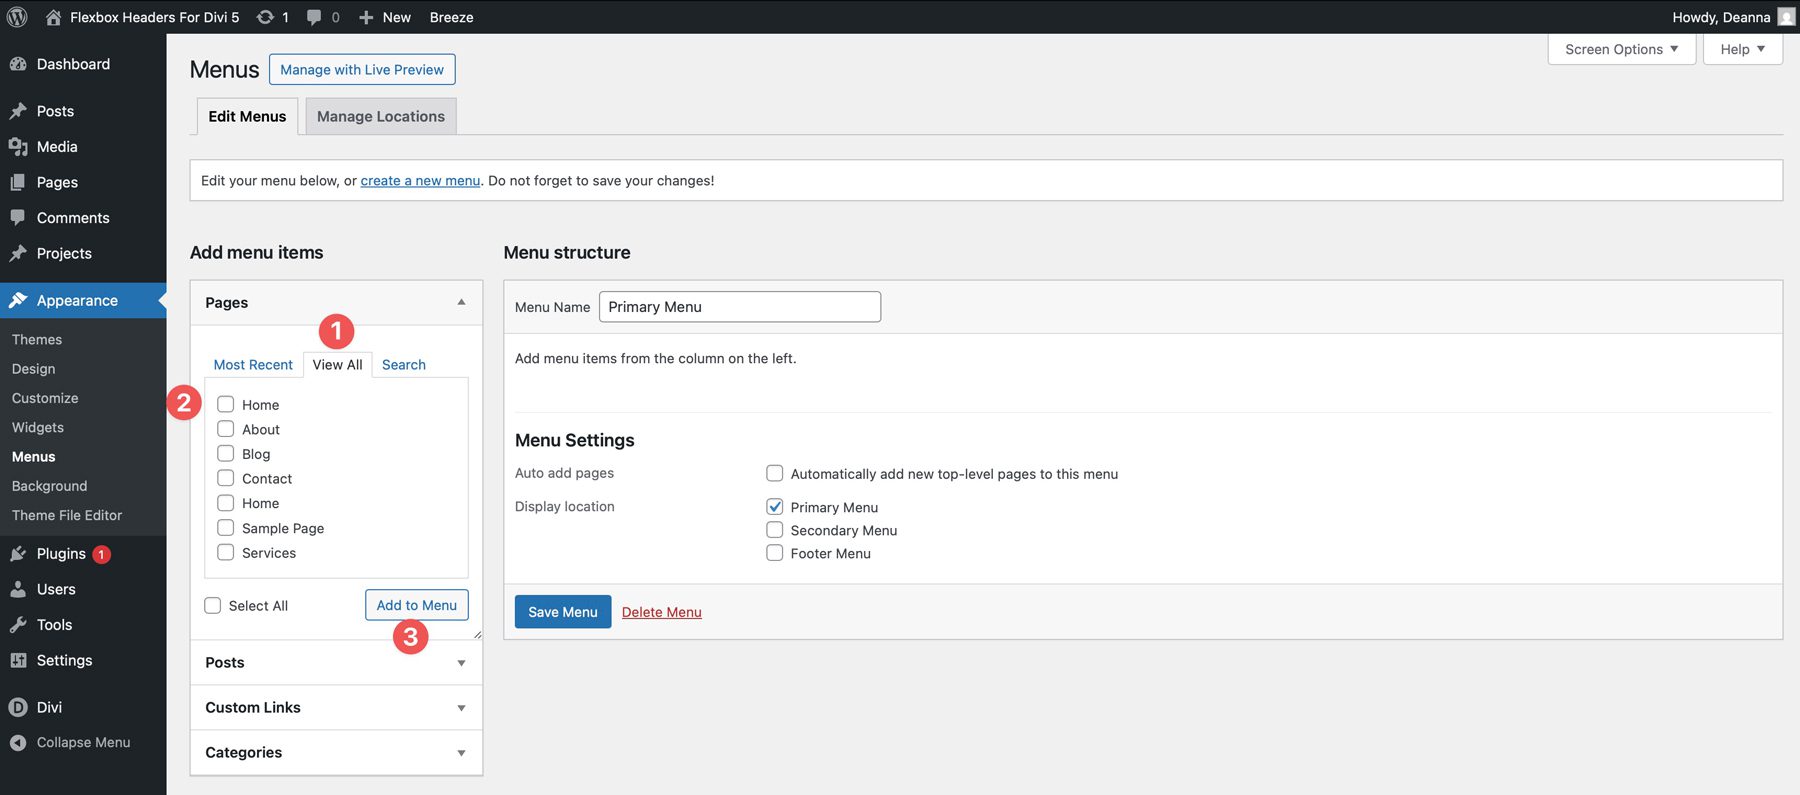
To add pages to the menu, click the View All tab and select the pages that you’d like to appear in the menu. Click Add to Menu to assign them.
Back in the Theme Builder, make additional changes as necessary. For example, if the header uses the Loop Builder, you may need to adjust the order of the links.
Use Divi 5 For Building Your Headers Today
These 20 Flexbox headers are a quick way to speed up your Divi 5 builds, whether you’re working from your established global styles or starting with a predesigned look. Download them, drop them into the Theme Builder, and make them your own. Flexbox handles the alignment so that you can focus on design.
The post 20 Flexbox Headers For Divi 5 (Free Download!) appeared first on Elegant Themes Blog.